Welcome to Chef.koch.rocks!

Welcome to Chef.cook.rocks! Our focus is on culinary delight and inspiration. We offer a diverse selection of vibrant food pictures and cool recipes that will excite both experienced chefs and beginners.
Discover my amazing Recipe Gallery and get inspired!
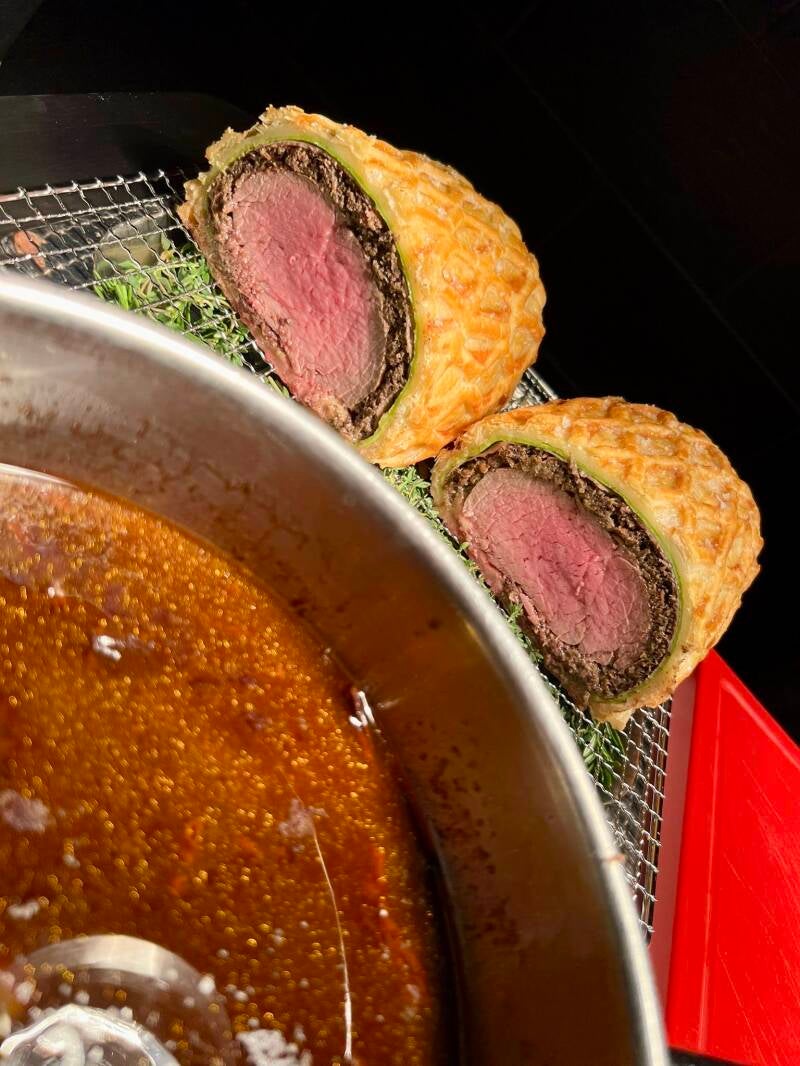
Beef Wellington
Ingredients:
- 2 lb (900 g) beef tenderloin (center cut)
Salt and freshly ground black pepper, to taste
- 2 tbsp olive oil
- 1 lb (450 g) cremini or button mushrooms, finely chopped
- 2 tbsp unsalted butter
- 2 cloves garlic, minced
- 1 tbsp fresh thyme leaves, chopped
- 12 slices prosciutto
- 2 tbsp Dijon mustard
- 1 sheet puff pastry, thawed if frozen
- 1 large egg, beaten with 1 tbsp water (egg wash)
Instructions:
Prepare the Beef:
Season the beef tenderloin generously with salt and pepper.
Heat olive oil in a large skillet over high heat. Sear the beef on all sides until browned, about 2-3 minutes per side.
Remove from skillet and let it cool. Once cooled, brush the beef with Dijon mustard.
Make the Mushroom Duxelles:
In a food processor, pulse the mushrooms until finely chopped.
Heat the butter in a skillet over medium heat. Add the mushrooms, garlic, and thyme, cooking until the mixture is dry and all the moisture has evaporated, about 10-12 minutes. Season with salt and pepper, then set aside to cool.
Assemble the Wellington:
Lay a large sheet of plastic wrap on a clean surface. Arrange the prosciutto slices in an overlapping layer.
Spread the mushroom duxelles evenly over the prosciutto.
Place the beef on top of the mushroom mixture. Use the plastic wrap to tightly roll the prosciutto and mushroom layer around the beef. Twist the ends of the plastic wrap to secure and refrigerate for 30 minutes.
Wrap in Puff Pastry:
Preheat your oven to 400°F (200°C).
Roll out the puff pastry on a lightly floured surface. Remove the beef from the plastic wrap and place it in the center of the pastry.
Wrap the pastry around the beef, sealing the edges tightly. Trim any excess pastry. Brush the entire pastry with the egg wash.
Bake the Wellington:
Place the wrapped beef on a baking sheet, seam side down. Brush with additional egg wash for a golden crust.
Use a knife to lightly score the pastry for decoration, if desired.
Bake for 35-40 minutes, or until the pastry is golden brown and the beef reaches your desired level of doneness (130°F/55°C for medium-rare).
Rest and Serve:
Let the Beef Wellington rest for 10-15 minutes before slicing.
Slice into thick rounds and serve with your favorite side dishes, like roasted vegetables or mashed potatoes.
Enjoy your classic Filet Wellington!
Potato Chorizo Croquettes
Ingredients:
- 400 g (about 2 large) potatoes, peeled and diced
- 150 g chorizo sausage, finely chopped
- 1 small onion, finely diced
- 2 cloves garlic, minced
- 2 tablespoons parsley, finely chopped
- 1 teaspoon smoked paprika (optional)
- Salt and pepper, to taste
- 1 egg, beaten
- 100 g (about 1 cup) breadcrumbs
- 50 g (about 1/3 cup) flour
- 1 egg (additional), for breading
- Oil, for frying
Instructions:
- Boil the Potatoes:
Cook the diced potatoes in salted boiling water until soft (about 10–15 minutes). Drain well and mash until smooth. Let them cool slightly. - Prepare the Filling:
In a pan over medium heat, sauté the onion until translucent. Add the garlic and chorizo, and cook for another 3–4 minutes until the chorizo releases its oils and is cooked through. Remove from heat. - Mix the Dough:
In a large bowl, combine the mashed potatoes, chorizo mixture, parsley, smoked paprika (if using), and the beaten egg. Season with salt and pepper to taste. Mix until well combined. Chill the mixture for at least 30 minutes to make shaping easier. - Shape the Croquettes:
With your hands, form small cylinders or balls (about the size of a golf ball) from the chilled mixture. - Breading:
Set up three bowls: one with flour, one with a beaten egg, and one with breadcrumbs. Roll each croquette first in flour, then in egg, and finally in breadcrumbs, ensuring they are fully coated. - Frying:
Heat oil in a deep pan or fryer to 170–180°C (340–355°F). Fry the croquettes in batches until golden brown and crispy (about 2–3 minutes). Do not overcrowd the pan. - Drain and Serve:
Remove the croquettes with a slotted spoon and drain them on paper towels. Serve hot with your favorite dipping sauce or aioli.

Spaghetti alla Carbonara, made the authentic Italian way
Ingredients:
• 400 g (14 oz) spaghetti
• 150 g (5 oz) guanciale (or pancetta), cut into small strips
• 3 large eggs
• 100 g (3.5 oz) Pecorino Romano cheese, finely grated
• Salt and black pepper, to taste
• 1 tablespoon olive oil (optional, depending on the fat from the guanciale)
Instructions:
1. Cook the spaghetti:
• Bring a large pot of salted water to a boil. Add the spaghetti and cook according to the package instructions until al dente.
2. Prepare the guanciale:
• While the pasta cooks, heat a skillet over medium heat. Add the guanciale (no need for oil unless it’s very lean) and cook until it becomes crispy and the fat is rendered, about 5-7 minutes. Remove from heat and set aside.
3. Make the egg mixture:
• In a mixing bowl, whisk together the eggs and most of the Pecorino Romano cheese, leaving a small amount for garnish. Season with a good amount of freshly ground black pepper.
4. Combine pasta and sauce:
• Once the pasta is done, reserve 1 cup of the pasta cooking water and drain the spaghetti.
• Quickly add the hot pasta to the pan with the guanciale and toss to coat. Remove the pan from the heat.
• Immediately pour in the egg and cheese mixture, tossing the pasta quickly to create a creamy sauce. The residual heat of the pasta will cook the eggs gently, without scrambling them. Add a little of the reserved pasta water, one tablespoon at a time, to loosen the sauce if necessary.
5. Serve:
• Divide the spaghetti among plates and top with the remaining Pecorino Romano and an extra grind of black pepper.
• Serve immediately.
Note:
The key to a perfect Carbonara is the balance between the creamy egg sauce and the crisp, flavorful guanciale. Avoid cream or butter—this dish relies on the eggs and cheese for its rich texture!

Hake with Roasted Parsnip Purée
Ingredients:
For the Hake:
• 4 hake fillets (about 6 oz each)
• 2 tablespoons olive oil
• Salt and pepper to taste
• 1 tablespoon butter
• 1 lemon, sliced (for garnish)
For the Roasted Parsnip Purée:
• 4 large parsnips, peeled and cut into chunks
• 2 tablespoons olive oil
• Salt and pepper to taste
• 1/2 cup heavy cream (or milk for a lighter option)
• 1 tablespoon butter
• 1 garlic clove, minced (optional)
• Fresh thyme or parsley for garnish
Instructions:
1. Roast the Parsnips:
• Preheat your oven to 400°F (200°C).
• Toss the parsnip chunks with olive oil, salt, and pepper, and spread them out on a baking sheet.
• Roast for 25-30 minutes, or until the parsnips are golden and tender.
2. Make the Parsnip Purée:
• Once the parsnips are roasted, transfer them to a blender or food processor.
• Add the butter and heavy cream (or milk), and blend until smooth and creamy. If using, add the minced garlic for extra flavor. You can adjust the consistency by adding more cream if needed.
• Season with salt and pepper to taste and keep warm.
3. Cook the Hake:
• Pat the hake fillets dry and season both sides with salt and pepper.
• Heat olive oil in a large skillet over medium-high heat. Add the hake fillets, skin-side down, and cook for about 3-4 minutes until the skin is crispy.
• Flip the fillets, add the butter to the pan, and cook for another 3-4 minutes until the fish is opaque and flakes easily with a fork.
• Squeeze a little lemon juice over the fish for a fresh finish.
4. Serve:
• Spoon the roasted parsnip purée onto a plate, and place the hake fillets on top.
• Garnish with fresh thyme or parsley and a slice of lemon on the side.
Enjoy your Hake with Roasted Parsnip Purée—a perfect combination of delicate fish and creamy, slightly sweet parsnips!

Octopus with Tomatoes
Ingredients:
• 2 lbs fresh octopus, cleaned
• 4 large tomatoes, chopped
• 1 medium onion, finely diced
• 3 cloves garlic, minced
• 1/4 cup olive oil
• 1/2 cup dry white wine
• 1/4 cup fresh parsley, chopped
• 1 bay leaf
• 1/2 teaspoon red pepper flakes (optional)
• Salt and pepper to taste
• Lemon wedges, for serving
Instructions:
1. Prepare the octopus:
If your octopus is large, cut it into 3-4 inch pieces. Rinse under cold water and set aside.
2. Cook the octopus:
Bring a large pot of water to a boil. Add the octopus and cook for about 45 minutes or until tender when pierced with a fork. Once done, drain and allow it to cool slightly.
3. Sauté the aromatics:
In a large skillet, heat olive oil over medium heat. Add the chopped onion and cook until soft, about 5 minutes. Stir in the minced garlic and cook for another 1 minute, until fragrant.
4. Add the tomatoes:
Stir in the chopped tomatoes and cook for 10 minutes, allowing them to break down. Add the bay leaf and red pepper flakes (if using). Season with salt and pepper.
5. Simmer with wine:
Pour in the white wine, stir, and let the mixture simmer for 10-15 minutes, until the sauce thickens slightly.
6. Combine with octopus:
Add the cooked octopus pieces to the tomato sauce. Simmer for another 10-15 minutes, allowing the flavors to blend together.
7. Finish and serve:
Stir in the fresh parsley and remove from heat. Serve the octopus warm, garnished with lemon wedges. This dish is great with crusty bread or over pasta.
Enjoy your Octopus with Tomatoes!

Zucchini Chili Pasta
Ingredients:
• 2 medium zucchinis, spiralized or cut into thin strips
• 12 oz (340g) pasta (penne, spaghetti, or your choice)
• 2 tbsp olive oil
• 3 cloves garlic, minced
• 1 small onion, finely chopped
• 1 can (14.5 oz) diced tomatoes
• 1 can (15 oz) black beans, drained and rinsed
• 1 cup corn (fresh, frozen, or canned)
• 1 tbsp chili powder
• 1 tsp ground cumin
• 1/2 tsp smoked paprika
• Salt and pepper, to taste
• 1/4 tsp red pepper flakes (optional for extra heat)
• 1/4 cup fresh cilantro, chopped (optional for garnish)
• 1/2 cup shredded cheddar cheese (optional)
Instructions:
1. Cook the pasta: Bring a large pot of salted water to a boil. Add the pasta and cook according to package instructions. Drain and set aside, reserving about 1/2 cup of pasta water.
2. Sauté the aromatics: While the pasta is cooking, heat the olive oil in a large skillet over medium heat. Add the garlic and onions and cook until softened and fragrant, about 3-4 minutes.
3. Add spices and vegetables: Stir in the chili powder, cumin, and smoked paprika. Cook for another minute to toast the spices. Then add the diced tomatoes, black beans, and corn. Let the mixture simmer for 5-7 minutes, stirring occasionally. Season with salt, pepper, and red pepper flakes, if using.
4. Cook the zucchini: Add the spiralized or thinly sliced zucchini to the skillet. Cook for 2-3 minutes until the zucchini softens slightly but still has a bit of crunch.
5. Combine pasta and sauce: Add the cooked pasta to the skillet and toss everything together. If the sauce is too thick, add a splash of the reserved pasta water to loosen it up.
6. Serve: Top with fresh cilantro and shredded cheese, if desired. Serve warm.
Enjoy your Zucchini Chili Pasta! It’s a flavorful, veggie-packed dish with a kick!

Best Saffron Risotto
Ingredients:
• 4 cups chicken or vegetable broth (low sodium)
• 1 pinch saffron threads
• 2 tbsp unsalted butter
• 1 tbsp olive oil
• 1 small onion, finely chopped
• 2 cloves garlic, minced
• 1 ½ cups Arborio rice
• ½ cup dry white wine
• ½ cup grated Parmesan cheese
• Salt and pepper, to taste
• Fresh parsley or basil for garnish (optional)
Instructions:
1. Infuse the saffron:
• In a small saucepan, warm the broth over low heat. Add the saffron threads and let them steep while you prepare the risotto. Keep the broth warm, but not boiling.
2. Cook the aromatics:
• In a large pan or skillet, heat the olive oil and 1 tablespoon of butter over medium heat.
• Add the chopped onion and cook for about 4-5 minutes, until softened and translucent. Stir in the minced garlic and cook for an additional minute.
3. Toast the rice:
• Add the Arborio rice to the pan, stirring to coat the grains with the butter and oil. Cook for 2-3 minutes, allowing the rice to lightly toast.
4. Deglaze with wine:
• Pour in the white wine and stir constantly until it’s mostly absorbed by the rice, about 2-3 minutes.
5. Cook the risotto:
• Begin adding the warm saffron-infused broth, one ladleful (about ½ cup) at a time. Stir frequently and wait until the liquid is almost fully absorbed before adding more broth.
• Continue this process for about 18-20 minutes until the rice is creamy and tender, but still slightly al dente.
6. Finish with butter and cheese:
• Once the risotto is cooked, stir in the remaining tablespoon of butter and the grated Parmesan cheese. Taste and season with salt and pepper, if needed.
7. Serve:
• Spoon the risotto into bowls, garnish with fresh herbs like parsley or basil if desired, and serve immediately.
Enjoy this rich and creamy saffron risotto as a main course or alongside your favorite protein!

Classic Cheesecake
Ingredients:
For the crust:
• 1 ½ cups graham cracker crumbs
• ¼ cup granulated sugar
• ½ cup unsalted butter, melted
For the filling:
• 4 (8 oz) packages cream cheese, softened
• 1 cup granulated sugar
• 1 tsp vanilla extract
• 4 large eggs
• 1 cup sour cream
Instructions:
1. Prepare the crust:
• Preheat your oven to 325°F (163°C).
• In a medium bowl, mix the graham cracker crumbs, sugar, and melted butter until the mixture resembles wet sand.
• Press the mixture into the bottom of a 9-inch springform pan, covering the bottom evenly.
• Bake the crust for 10 minutes, then remove from the oven and let it cool.
2. Make the filling:
• In a large bowl, beat the softened cream cheese with an electric mixer until smooth and creamy.
• Add the sugar and vanilla extract, mixing until well combined.
• Add the eggs one at a time, beating on low speed after each addition just until incorporated.
• Finally, mix in the sour cream until smooth.
3. Assemble and bake:
• Pour the cream cheese filling over the cooled crust, spreading it evenly.
• Bake the cheesecake for 55-60 minutes, or until the center is slightly jiggly but mostly set.
• Turn off the oven and crack the oven door, allowing the cheesecake to cool slowly in the oven for about 1 hour. This helps prevent cracks.
4. Chill and serve:
• After the cheesecake has cooled, refrigerate it for at least 4 hours or overnight before serving.
• Run a knife around the edge of the cheesecake before removing the springform pan.
Serve plain, or top with fresh berries, whipped cream, or your favorite sauce! Enjoy!

Perfectly Pink Pork Tenderloin
Ingredients:
• 1 pork tenderloin (about 1-1.5 lbs)
• 2 tbsp olive oil
• Salt and pepper, to taste
• 2 cloves garlic, minced
• 1 tbsp fresh rosemary, chopped (or 1 tsp dried)
• 1 tbsp fresh thyme, chopped (or 1 tsp dried)
• 1 tbsp Dijon mustard (optional)
Instructions:
1. Prepare the pork:
• Preheat your oven to 400°F (200°C).
• Pat the pork tenderloin dry with paper towels.
• Rub the tenderloin with olive oil, then season generously with salt, pepper, minced garlic, rosemary, and thyme. You can also rub it with Dijon mustard for extra flavor.
2. Sear the tenderloin:
• Heat a large oven-safe skillet over medium-high heat.
• Once hot, add a little olive oil and sear the pork tenderloin on all sides until golden brown, about 2-3 minutes per side.
3. Roast the pork:
• Transfer the skillet with the pork tenderloin into the preheated oven.
• Roast for 12-15 minutes, or until the internal temperature of the pork reaches 145°F (63°C). This will ensure it stays juicy and has a slight pink color in the center.
4. Rest the meat:
• Remove the pork from the oven and transfer it to a cutting board. Cover it loosely with aluminum foil and let it rest for 5-10 minutes. This allows the juices to redistribute through the meat.
5. Slice and serve:
• Slice the tenderloin into medallions and serve with your favorite sides like roasted vegetables or mashed potatoes.
Enjoy your perfectly pink and tender pork!

Tuna Tartare with Wasabi
Ingredients:
• 200g fresh sushi-grade tuna (yellowfin or bluefin), diced into small cubes
• 1 tablespoon soy sauce
• 1 teaspoon sesame oil
• 1 teaspoon rice vinegar
• 1 teaspoon lime juice
• 1 teaspoon fresh ginger, finely grated
• 1 tablespoon finely chopped scallions
• 1 tablespoon finely chopped cilantro (optional)
• 1/2 avocado, diced (optional)
• 1/2 teaspoon wasabi paste (adjust to taste)
• 1 teaspoon sesame seeds (for garnish)
• Salt and pepper to taste
• Microgreens or seaweed (for garnish)
• Toasted bread, crackers, or cucumber slices for serving
Instructions:
Prepare the Tuna:
Start by dicing the tuna into small cubes. Ensure the fish is very fresh and chilled. Place it in a large mixing bowl.
Make the Dressing:
In a small bowl, mix together the soy sauce, sesame oil, rice vinegar, lime juice, grated ginger, and wasabi paste. Taste the dressing and adjust the wasabi for more heat if needed.
Combine the Ingredients:
Pour the dressing over the diced tuna and gently toss to combine. Add the chopped scallions, cilantro, and avocado (if using) to the mix.
Season:
Season with a little salt and pepper, being careful with the salt as soy sauce is already salty. Let the mixture sit for about 10 minutes to allow the flavors to meld together.
Serve:
Use a ring mold to plate the tuna tartare neatly if desired. Garnish with sesame seeds, microgreens, or seaweed.
Accompaniments:
Serve with toasted bread, crackers, or cucumber slices for a light and refreshing touch.
Enjoy your Tuna Tartare with Wasabi!

Sous Vide Duck Breast
Ingredients:
- 2 duck breasts
- Salt and pepper, to taste
- 2-3 sprigs of fresh thyme (optional)
- 2 cloves garlic, crushed (optional)
- 1 tbsp olive oil (for searing)
Instructions:
1.Prepare the duck breast:
Pat the duck breasts dry with a paper towel.
Score the skin in a crisscross pattern, being careful not to cut into the meat.Season both sides generously with salt and pepper. You can also add the thyme and garlic for extra flavor.
2. Vacuum seal:
Place the seasoned duck breasts in a vacuum-seal bag. If you're using thyme and garlic, place them in the bag as well. Seal the bag using a vacuum sealer, ensuring it's airtight. If you don’t have a vacuum sealer, you can use the water displacement method with a zip-top bag.
3.Sous vide cooking:
Preheat your sous vide machine to **135°F (57°C)** for a medium-rare result. You can adjust to **130°F (54°C)** for rare or **140°F (60°C)** for medium.
Place the sealed duck breasts in the water bath and cook for **2 hours**.
4.Sear the duck:
Once the sous vide cooking is done, remove the duck breasts from the bag and pat them dry again.
Heat a skillet over medium-high heat and add a small amount of olive oil.
Place the duck breasts skin-side down in the skillet and sear for about 2-3 minutes until the skin is crispy and golden brown.
Flip the breasts and quickly sear the meat side for about 30 seconds.
5. Rest and serve:
Remove the duck from the skillet and let it rest for 5 minutes before slicing. Slice the duck breast thinly and serve with your favorite sides, like roasted vegetables or a fruit-based sauce.
Enjoy your perfectly cooked, tender, and juicy sous vide duck breast!

Braised Lamb Shanks
Ingredients:
- 4 lamb shanks
- Salt and pepper, to taste
- 2 tablespoons olive oil
- 1 large onion, chopped
- 2 carrots, chopped
- 2 celery stalks, chopped
- 4 garlic cloves, minced
- 1 tablespoon tomato paste
- 1 cup red wine
- 2 cups beef or chicken broth
- 1 can (14.5 oz) diced tomatoes
- 2 sprigs fresh rosemary
- 2 sprigs fresh thyme
- 2 bay leaves
- 1 teaspoon ground cumin (optional)
- Zest of 1 lemon
- Chopped fresh parsley (for garnish)
Instructions:
Preheat the oven:
Preheat your oven to 325°F (165°C).
Season the lamb shanks:
Pat the lamb shanks dry with a paper towel, then generously season them with salt and pepper on all sides.
Brown the lamb shanks:
In a large ovenproof pot or Dutch oven, heat the olive oil over medium-high heat. Add the lamb shanks and sear them on all sides until nicely browned, about 8-10 minutes. Remove the shanks from the pot and set them aside.
Sauté the vegetables:
In the same pot, add the chopped onion, carrots, and celery. Cook for about 5-7 minutes, until the vegetables are softened. Add the garlic and cook for another minute, until fragrant.
Add the tomato paste and deglaze:
Stir in the tomato paste and cook for 1-2 minutes. Then pour in the red wine, using a wooden spoon to scrape up any browned bits from the bottom of the pot. Let the wine simmer for about 5 minutes, reducing slightly.
Add the broth and herbs:
Stir in the broth, diced tomatoes, rosemary, thyme, bay leaves, and cumin (if using). Return the lamb shanks to the pot, nestling them into the liquid. The liquid should cover most of the shanks; add more broth if needed.
Braise the lamb:
Bring the mixture to a simmer, then cover the pot and transfer it to the preheated oven. Let the lamb shanks braise for about 2.5 to 3 hours, or until the meat is tender and falling off the bone.
Finish and serve:
Once the lamb is done, remove the pot from the oven. Discard the rosemary, thyme, and bay leaves. Stir in the lemon zest for a fresh burst of flavor. Garnish with chopped parsley before serving.
Serving suggestion:
Serve the braised lamb shanks with mashed potatoes, polenta, or crusty bread to soak up the rich sauce.
Enjoy!

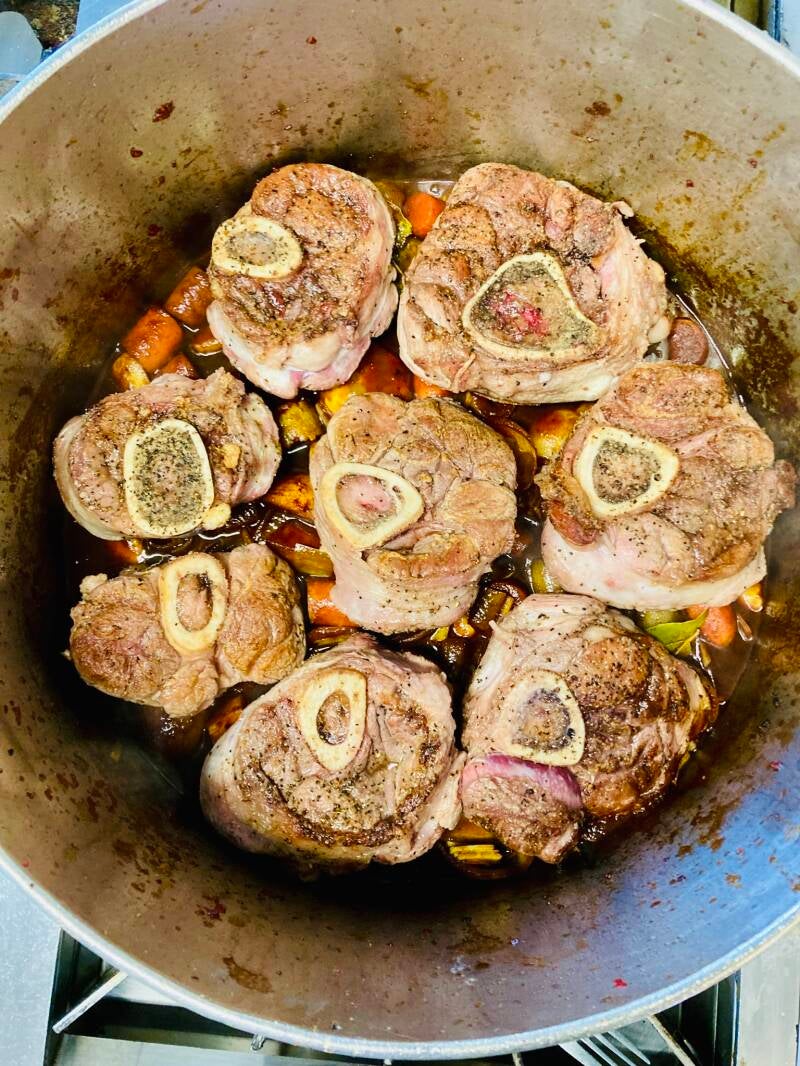
Osso Buco
Ingredients (for 4 people):
- 4 veal shanks (about 4 cm thick, approx. 300 g each)
- 2 carrots
- 1 onion
- 2 celery stalks
- 2 garlic cloves
- 400 g canned diced tomatoes
- 200 ml white wine
- 300 ml veal or vegetable stock
- 2 tbsp tomato paste
- 2 tbsp flour
- 1 bay leaf
- 2 sprigs of thyme
- 1 sprig of rosemary
- 1 organic lemon (for the gremolata)
- 1 bunch of parsley (for the gremolata)
- 1 garlic clove (for the gremolata)
- Salt, pepper
- Olive oil
Preparation:
- Tie the veal shanks with kitchen twine to help them keep their shape during braising.
- Lightly dust the meat with flour, then sear in a heavy braising pot with some olive oil until golden brown on both sides. Remove and set aside.
Sweat the vegetables:
- Peel and finely dice the carrots, onions, and celery. Finely chop the garlic.
- In the same pot, sauté the vegetables over medium heat in some olive oil until soft and lightly browned (about 5 minutes).
Deglaze and reduce:
- Add tomato paste and briefly roast it. Deglaze with white wine and let it reduce a bit.
- Add the canned tomatoes and veal or vegetable stock, stirring well.
Braise:
- Return the veal shanks to the pot. Add thyme, rosemary, and the bay leaf. Lightly season with salt and pepper.
- Cover the pot with a lid and let the Osso Buco braise over low heat for about 1.5 to 2 hours. Check occasionally to ensure there's enough liquid, adding more stock or water if necessary.
Prepare the gremolata:
- While the meat braises, zest the organic lemon and finely chop the parsley. Finely dice a garlic clove and mix everything together. This gremolata will be sprinkled on top of the Osso Buco as a fresh garnish.
Serve:
- Once the braising is complete, carefully remove the shanks from the pot. If the sauce is too thin, let it simmer uncovered until it thickens.
- Serve the Osso Buco with the sauce and sprinkle the gremolata on top.
Side dish:
Osso Buco is traditionally served with Risotto alla Milanese (saffron risotto) or polenta.
Enjoy your meal!
Venison Ravioli
Ingredients for the filling:
- 9 oz (250g) venison (ground or finely diced)
- 1 onion (finely chopped)
- 1 clove of garlic (minced)
- 1 tbsp olive oil
- 2 tbsp breadcrumbs
- 1 tbsp fresh parsley (chopped)
- 1 egg
- Salt and pepper to taste
- A pinch of nutmeg (optional)
Ingredients for the dough:
- 2 cups (250g) all-purpose flour
- 2 large eggs
- 1 tbsp olive oil
- A pinch of salt
- A little water (as needed)
Ingredients for the sauce:
- 1 cup (240ml) heavy cream
- 1/2 cup (120ml) beef broth
- 1/4 cup (60ml) red wine (optional)
- 1 tbsp butter
- Salt and pepper to taste
- Freshly grated Parmesan cheese (for serving)
Instructions:
Make the dough:
- In a large bowl, combine the flour, eggs, olive oil, and salt. Mix until a dough forms. If the dough is too dry, add a little water, one tablespoon at a time.
- Knead the dough on a floured surface for about 5-7 minutes until it becomes smooth and elastic.
- Wrap the dough in plastic wrap and let it rest for about 30 minutes.
Prepare the filling:
- Heat the olive oil in a pan over medium heat. Sauté the onion and garlic until soft and translucent.
- Add the venison and cook until browned.
- Stir in the breadcrumbs, parsley, salt, pepper, and nutmeg.
- Remove from heat and let the filling cool slightly before mixing in the egg.
Assemble the ravioli:
- Roll out the dough as thin as possible using a pasta machine or a rolling pin.
- Cut the dough into long strips.
- Place small amounts of filling (about a teaspoon each) spaced evenly apart on one strip of dough.
- Cover with another strip of dough and press around the filling to seal the edges.
- Cut out the ravioli with a ravioli cutter or a knife.
Cook the ravioli:
- Bring a large pot of salted water to a boil. Carefully add the ravioli and cook for about 3-5 minutes, or until they float to the surface.
Prepare the sauce:
- In a small saucepan, melt the butter over medium heat. Add the beef broth and red wine, then simmer for a few minutes to reduce.
- Stir in the cream and season with salt and pepper.
- Let the sauce simmer until it thickens slightly.
Serve:
- Drain the ravioli and serve with the sauce. Garnish with freshly grated Parmesan cheese.
Enjoy your homemade venison ravioli!

Lentil Soup with Bacon
Ingredients:
• 6 slices bacon, chopped
• 1 medium onion, finely chopped
• 2 carrots, diced
• 2 celery stalks, diced
• 3 garlic cloves, minced
• 1 1/2 cups dried lentils, rinsed (green or brown lentils work best)
• 6 cups chicken or vegetable broth
• 1 can (14 oz) diced tomatoes, drained
• 1 bay leaf
• 1 teaspoon dried thyme
• Salt and pepper to taste
• 1 tablespoon red wine vinegar (optional, for extra flavor)
• Fresh parsley for garnish (optional)
Instructions:
1. Cook the Bacon:
• In a large pot, cook the chopped bacon over medium heat until crispy. Remove the bacon with a slotted spoon and set aside on a paper towel, leaving the bacon fat in the pot.
2. Sauté the Vegetables:
• In the same pot, add the chopped onion, carrots, and celery to the bacon fat. Cook for about 5 minutes until the vegetables soften.
• Stir in the minced garlic and cook for another minute until fragrant.
3. Add the Lentils and Broth:
• Add the rinsed lentils, chicken or vegetable broth, diced tomatoes, bay leaf, and dried thyme to the pot.
• Bring the soup to a boil, then reduce the heat and let it simmer, uncovered, for about 25-30 minutes or until the lentils are tender.
4. Season and Finish:
• Once the lentils are cooked, remove the bay leaf. Season the soup with salt, pepper, and the red wine vinegar if using, for a touch of acidity.
• Stir in the crispy bacon and let the soup simmer for another 5 minutes.
5. Serve:
• Ladle the soup into bowls and garnish with fresh parsley if desired.
• Serve warm with crusty bread or a side salad.
Enjoy this hearty, flavorful Lentil Soup with Bacon—perfect for a cozy meal!

Vitello Tonnato
Ingredients:
For the veal:
- 1.5 lbs (600 g) veal roast (or veal loin)
- 1 onion
- 1 carrot
- 1 celery stalk
- 2 bay leaves
- 3 cloves
- 1 garlic clove
- 1/2 cup (100 ml) white wine
- 4 cups (1 liter) water
- Salt and pepper
For the tuna sauce:
- 1 can tuna in oil (about 5 oz / 150 g)
- 2 egg yolks
- 1 tbsp lemon juice
- 4 anchovy fillets
- 2 tbsp capers
- 3/4 cup (200 ml) mayonnaise
- 1/2 cup (100 ml) veal broth (from cooking the meat)
- Salt and pepper
For garnish:
- Capers
- Lemon slices
- Fresh parsley
Instructions:
Prepare the veal:
Roughly chop the onion, carrot, and celery. In a large pot, bring the water to a boil along with the vegetables, bay leaves, cloves, garlic, and white wine. Lightly salt the water.
Add the veal to the pot and simmer over low heat for 45-60 minutes, until the meat is tender. Remove the veal and let it cool. Save the broth for the tuna sauce.
Make the tuna sauce:
In a blender or with an immersion blender, puree the tuna, egg yolks, anchovies, capers, and lemon juice until smooth. Stir in the mayonnaise and gradually add some cooled veal broth until you achieve a creamy consistency. Season with salt and pepper to taste.
Slice and plate the veal:
Once cooled, slice the veal very thinly and arrange the slices on a large platter. Generously spoon the tuna sauce over the meat, ensuring it is well covered.
Garnish and serve:
Decorate the dish with capers, lemon slices, and fresh parsley. Refrigerate for at least 2 hours before serving to let the flavors meld.
Tip:
Vitello Tonnato tastes even better when prepared in advance, so feel free to let it chill overnight in the fridge for maximum flavor.
Enjoy!

Classic Beef Roast Recipe
Ingredients:
- 4 lbs (1.8 kg) beef chuck roast or beef brisket
- 2 tbsp olive oil
- 2 large onions, chopped
- 4 cloves garlic, minced
- 4 large carrots, peeled and cut into large pieces
- 4 celery stalks, chopped
- 3 cups beef broth
- 1 cup red wine (optional)
- 2 sprigs fresh rosemary
- 2 sprigs fresh thyme
- 2 bay leaves
- Salt and pepper, to taste
Instructions:
Preheat the Oven:
Preheat your oven to 325°F (165°C).
Season the Beef:
Generously season the beef roast with salt and pepper on all sides.
Sear the Meat:
Heat the olive oil in a large Dutch oven or oven-safe pot over medium-high heat. Once hot, add the beef roast and sear it on all sides until it’s browned. This should take about 4-5 minutes per side. Once browned, remove the roast and set it aside.
Cook the Vegetables:
In the same pot, add the chopped onions, carrots, and celery. Cook for about 5-7 minutes until the vegetables are softened. Add the minced garlic and cook for another minute.
Deglaze the Pot:
Pour in the red wine (if using) and scrape the bottom of the pot to loosen any browned bits. Let the wine simmer for a couple of minutes to reduce slightly.
Add the Beef Broth:
Pour in the beef broth and add the rosemary, thyme, and bay leaves. Bring the mixture to a simmer.
Combine and Roast:
Return the seared beef roast to the pot, ensuring it’s partially submerged in the liquid. Cover the pot with a lid and transfer it to the preheated oven.
Slow Cook:
Roast in the oven for about 3-4 hours, or until the beef is tender and can be easily shredded with a fork. Check occasionally and add more broth if needed.
Serve:
Once the beef is fully cooked, remove it from the oven. Let it rest for about 10 minutes before slicing or shredding. Serve with the cooked vegetables and pan juices.
Enjoy your classic American-style beef roast!

Salmon Carpaccio
Ingredients:
- 200 g fresh salmon fillet (sushi-grade)
- 2 tbsp extra virgin olive oil
- 1 tbsp freshly squeezed lemon juice
- 1 tsp honey
- Salt and freshly ground black pepper to taste
- 1 tsp capers (optional)
- 1 small red onion, finely sliced
- 1 tbsp freshly chopped dill
- 1 tbsp shaved Parmesan (optional)
- Arugula or other fresh greens for garnish
Instructions:
Prepare the Salmon:
Place the salmon fillet in the freezer for about 10-15 minutes to firm it up slightly. This will make it easier to slice into very thin pieces.
Slice the Salmon:
Using a sharp knife, slice the slightly frozen salmon into very thin pieces. Arrange the slices on a large plate or serving platter.
Make the Marinade:
In a small bowl, whisk together the olive oil, lemon juice, and honey. Season with salt and pepper to taste.
Marinate:
Drizzle the marinade evenly over the salmon slices. Let the salmon marinate for about 10-15 minutes to allow the flavors to meld.
Garnish:
Sprinkle the finely sliced red onion, capers (if using), and chopped dill over the salmon. Optional: add a bit of shaved Parmesan.
Serve:
Garnish the salmon carpaccio with fresh arugula or other greens and serve immediately. It pairs well with crispy baguette or as an appetizer for a fine meal.
Tip from me:
For an extra special touch, you can add a few drops of truffle oil or use lime juice instead of lemon juice.
Enjoy your meal!

The Perfect Cheese Spaetzle
"Swabian national dish"
Ingredients:
For the Spätzle:
- 2 cups (250g) all-purpose flour
- 4 large eggs
- ½ cup (120ml) water
- 1 teaspoon salt
- A pinch of nutmeg (optional)
For the Käsespätzle:
- 2 cups (200g) grated cheese (traditionally Emmental or a mix of Emmental and Gruyère)
- 2 large onions, thinly sliced
- 2 tablespoons butter
- Salt and pepper, to taste
- Fresh chives or parsley, chopped (optional, for garnish)
Instructions:
Make the Spätzle:
In a large mixing bowl, combine the flour and salt.
Add the eggs and water, then beat with a wooden spoon or a hand mixer until the dough is smooth and bubbles form. The consistency should be somewhat thick, but still pourable. If it's too thick, add a bit more water.
Let the dough rest for 10-15 minutes.
Cook the Spätzle:
Bring a large pot of salted water to a boil.
Using a Spätzle press, a colander, or a Spätzle board (Spätzlebrett), press or scrape small portions of the dough into the boiling water.
Cook the Spätzle in batches until they float to the surface, then let them cook for an additional 2-3 minutes.
Remove the Spätzle with a slotted spoon and transfer them to a bowl of cold water to stop the cooking process.
Drain well and set aside.
Prepare the Onions:
In a large skillet, melt the butter over medium heat.
Add the sliced onions and cook until they are golden brown and caramelized, stirring occasionally. This can take 15-20 minutes. Remove the onions and set them aside.
Assemble the Käsespätzle:
Preheat your oven to 350°F (175°C).
In a large baking dish, layer the Spätzle with the grated cheese, starting and ending with cheese.
Bake in the preheated oven for about 10-15 minutes, or until the cheese is melted and bubbly.
Top the Käsespätzle with the caramelized onions.
Serve:
Garnish with fresh chives or parsley, if desired.
Serve hot as a main dish or as a side.
Enjoy your homemade Swabian Käsespätzle!

The Most Delicious Apricot Dumplings
Ingredients (for 4 servings):
For the Dough:
- 250 g (about 9 oz) quark (or farmer's cheese)
- 80 g (about 3 oz) soft butter
- 1 egg
- A pinch of salt
- 80 g (about 2.8 oz) semolina
- 80 g (about 2.8 oz) flour
- 1 tsp lemon zest (unwaxed, finely grated)
For the Filling:
- 8 ripe apricots
- 8 sugar cubes (or marzipan for a sweeter filling)
For the Butter Crumbs:
- 100 g (about 3.5 oz) bread crumbs
- 50 g (about 1.8 oz) butter
- 2 tbsp sugar
- 1 tsp cinnamon (optional)
Instructions:
Prepare the Dough:
In a bowl, mix the quark, butter, egg, salt, semolina, flour, and lemon zest until well combined. Shape the dough into a smooth mass and refrigerate for about 30 minutes.
Prepare the Apricots:
Wash the apricots, pit them, and place a sugar cube or a bit of marzipan inside each apricot.
Form the Dumplings:
Divide the dough into 8 equal pieces. Flatten each piece of dough, place a filled apricot in the center, and wrap the dough around the apricot. Shape the dumplings into smooth balls with lightly floured hands.
Cook the Dumplings:
Bring a large pot of water with a pinch of salt to a boil. Carefully add the dumplings to the boiling water. Once the dumplings rise to the surface, reduce the heat and let them simmer for about 10-12 minutes.
Prepare the Butter Crumbs:
Melt the butter in a pan. Add the bread crumbs and cook, stirring constantly, until golden brown. Stir in the sugar and cinnamon (if using).
Serve:
Remove the cooked dumplings from the water and let them drain briefly. Roll the dumplings in the butter crumbs until evenly coated. Serve the apricot dumplings immediately, dusted with powdered sugar if desired.
Enjoy your meal!

"Crispy Chicken Mega Crispy"
Ingredients:
- 4 chicken breasts or chicken thighs (bone-in or boneless)
- 200 g (about 1 ⅔ cups) flour
- 100 g (about ½ cup) cornstarch
- 1 tsp paprika
- 1 tsp garlic powder
- 1 tsp onion powder
- 1 tsp dried oregano
- 1 tsp dried thyme
- 1 tsp salt
- ½ tsp black pepper
- 2 eggs
- 200 ml (about ¾ cup) buttermilk
- Vegetable oil for frying (e.g., sunflower oil)
Instructions:
Marinate the Chicken:
1. Place the chicken breasts or thighs in a bowl.
2. In a separate bowl, whisk together the eggs and buttermilk.
3. Submerge the chicken in the buttermilk-egg mixture, ensuring it’s well-coated. Marinate for at least 30 minutes (or up to 8 hours in the refrigerator).
Prepare the Coating:
1. In a large bowl, mix together the flour, cornstarch, paprika, garlic powder, onion powder, oregano, thyme, salt, and pepper.
Coat the Chicken:
1. Remove the chicken from the buttermilk mixture and let any excess liquid drip off.
2. Dredge each piece of chicken in the flour mixture, pressing down to ensure it’s fully coated. For extra crispiness, you can double-coat by dipping the chicken back into the buttermilk and then the flour mixture again.
Fry the Chicken:
1. Heat enough oil in a large pot or deep skillet to 175-180°C (350-365°F).
2. Carefully add the chicken pieces to the hot oil and fry for 8-12 minutes, or until golden brown and crispy. Be careful not to overcrowd the pot to ensure even crispiness.
3. Drain the fried chicken on a wire rack or paper towels.
Serve:
1. Serve the crispy chicken with sides such as fries, mashed potatoes, salad, or coleslaw. It also pairs well with dips like BBQ sauce, ranch dressing, or honey mustard.
Enjoy your meal!

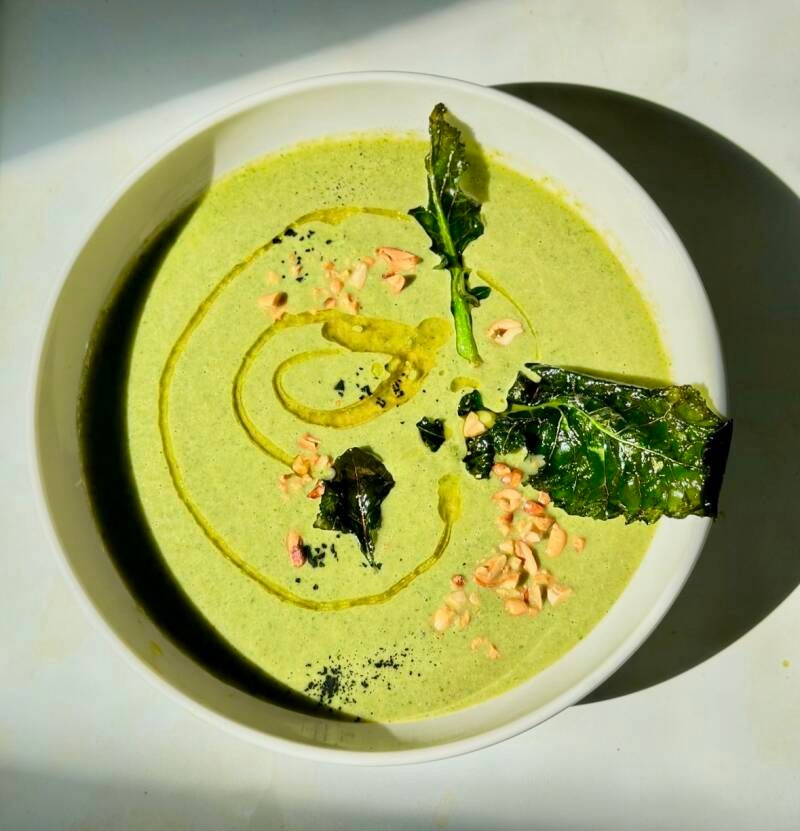
Creamy Broccoli and Greens Soup
Ingredients:
• 1 tbsp olive oil
• 1 medium onion, chopped
• 3 cloves garlic, minced
• 4 cups broccoli florets (about 1 large head)
• 2 cups fresh spinach (or kale)
• 1 medium zucchini, chopped
• 4 cups vegetable broth
• 1 cup coconut milk (or heavy cream)
• 1 tsp dried thyme
• 1/2 tsp ground cumin
• Salt and pepper, to taste
• 1/4 tsp crushed red pepper flakes (optional for heat)
• 1 tbsp lemon juice
• Fresh parsley, chopped (for garnish)
• Optional toppings: croutons, shredded cheese, or a drizzle of olive oil
Instructions:
1. Sauté the vegetables: Heat olive oil in a large pot over medium heat. Add the chopped onion and cook for about 4-5 minutes until softened. Add the garlic and cook for another minute until fragrant.
2. Add broccoli and zucchini: Stir in the broccoli florets and chopped zucchini, and sauté for another 2-3 minutes to soften slightly.
3. Simmer the soup: Add the vegetable broth, thyme, cumin, salt, pepper, and red pepper flakes (if using). Bring the mixture to a boil, then reduce the heat to a simmer. Cook for about 15-20 minutes, or until the broccoli and zucchini are tender.
4. Add the greens: Stir in the fresh spinach (or kale) and cook for another 2-3 minutes, just until the greens wilt.
5. Blend the soup: Use an immersion blender to carefully puree the soup until smooth and creamy. If you don’t have an immersion blender, transfer the soup in batches to a regular blender, then return it to the pot.
6. Add coconut milk: Stir in the coconut milk (or heavy cream) and lemon juice. Adjust seasoning with more salt and pepper if needed. Heat the soup for another 2-3 minutes, but don’t bring it to a boil.
7. Serve: Ladle the soup into bowls, garnish with fresh parsley, and add any desired toppings like croutons, shredded cheese, or a drizzle of olive oil.
Enjoy your Creamy Broccoli and Greens Soup—it’s a comforting, nourishing dish that’s both creamy and packed with veggies!
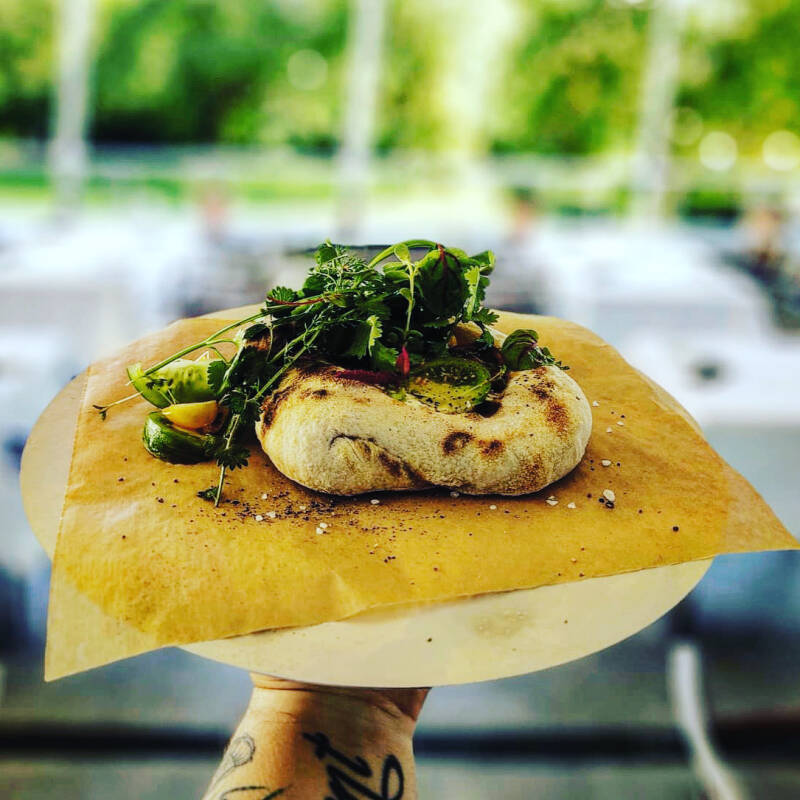
Super Easy Pizza Dough
Ingredients:
- 500 g wheat flour (Type 550)
- 10 g salt
- 10 g sugar
- 20 g fresh yeast (or 7 g dry yeast)
- 300 ml lukewarm water
- 3 tbsp olive oil
Preparation:
Prepare the Yeast:
If using fresh yeast, dissolve it in the lukewarm water and add the sugar. Let the mixture sit for 10 minutes until it becomes bubbly.
If using dry yeast, you can add it directly to the flour.
Mix the Dough:
Place the flour in a large bowl and mix in the salt. Make a well in the center of the flour and pour in the yeast water (or the dry yeast). Add the olive oil.
Knead the Dough:
Mix the ingredients with a wooden spoon until a dough forms. Then knead the dough on a floured surface for about 10 minutes until it's smooth and elastic.
Let the Dough Rise:
Shape the dough into a ball and place it back in the bowl. Cover the bowl with a damp cloth and let the dough rise in a warm place for about 1-2 hours, until it has doubled in size.
Prepare the Dough:
After rising, knead the dough briefly again and divide it into 2-4 portions, depending on how large you want the pizzas to be.
Roll each portion out on a floured surface into a thin circle.
Top and Bake the Pizza:
Top the rolled-out dough circles with tomato sauce, cheese, and your favorite toppings.
Bake the pizza at 250°C (482°F) on a hot pizza stone or baking sheet in a preheated oven for 10-15 minutes until the crust is crispy and the cheese is melted.
Tip from me:
For the best flavor, let the dough rise overnight in the refrigerator after kneading. Take it out an hour before using to let it reach room temperature.
Enjoy your meal!
The Classic Roast Beef
Ingredients:
- 1.5 kg (3.3 lbs) roast beef (preferably center-cut, well-aged)
- 2 tbsp Dijon mustard
- 2-3 cloves garlic
- 2-3 sprigs fresh rosemary
- 2-3 sprigs fresh thyme
- 3 tbsp olive oil
- Salt and pepper to taste
Preparation:
Prepare the Meat:
Take the roast beef out of the refrigerator in advance so it can reach room temperature.
Preheat the oven to 120°C (250°F).
Pat the meat dry with paper towels, then season generously with salt and pepper.
Spread the Dijon mustard over the roast beef.
Peel and finely chop the garlic cloves.
Strip the rosemary and thyme leaves from their sprigs and combine them with the chopped garlic, then spread this mixture over the meat.
Sear the Meat:
Heat the olive oil in a large skillet over high heat.
Sear the roast beef on all sides until it forms a nice, golden-brown crust.
Roast the Beef:
Transfer the seared roast beef to an oven-safe dish and insert a meat thermometer into the center of the roast.
Cook the meat in the preheated oven at 120°C (250°F) until it reaches your desired internal temperature:
- **Rare:** 48-50°C (118-122°F)
- **Medium-Rare:** 52-54°C (126-129°F)
- **Medium:** 56-58°C (133-136°F)
The cooking time will vary depending on the size of the roast, but it typically takes about 1.5 to 2 hours.
Rest the Meat:
Once the roast reaches the desired temperature, remove it from the oven and wrap it in aluminum foil.
Let the meat rest for about 10-15 minutes to allow the juices to redistribute.
Serve:
Slice the roast beef thinly and arrange it on a warmed serving platter.
It can be served warm or cold, ideally with sides like potato gratin, roasted vegetables, or a fresh salad.
Enjoy your meal!
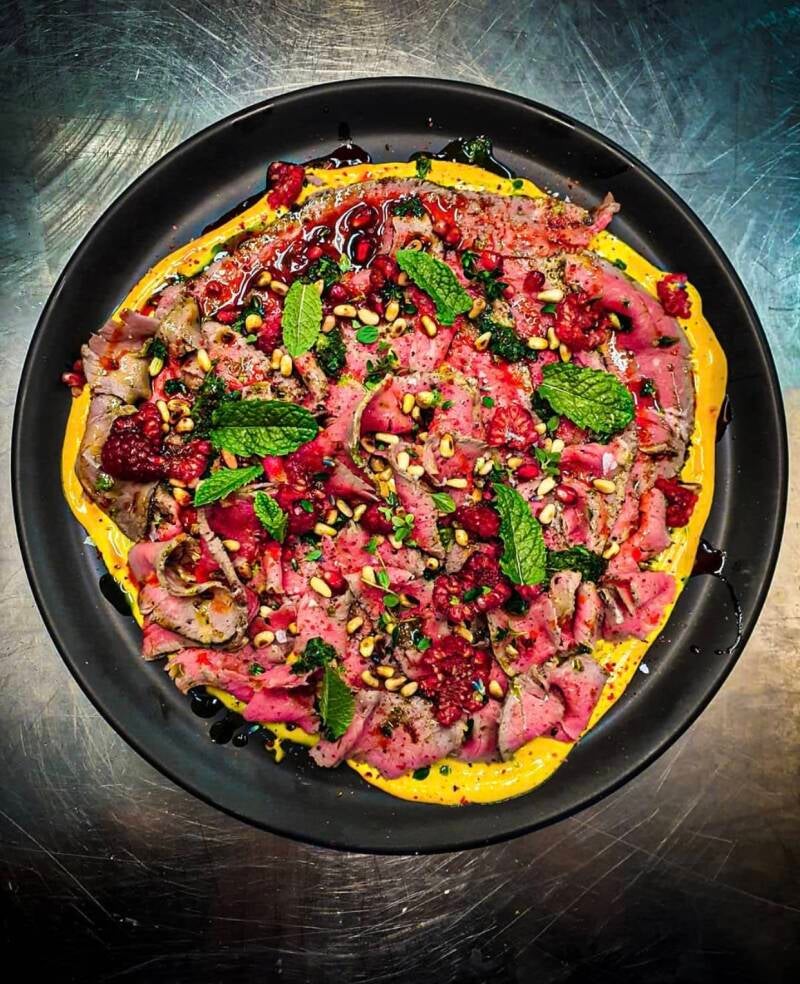
Summer Tomato Salad with Burrata
Ingredients:
- 4-5 ripe, colorful tomatoes (e.g., red, yellow, and green varieties)
- 1 ball of Burrata (about 200 g)
- 1 red onion
- A handful of fresh basil
- 2 tbsp good olive oil
- 1 tbsp balsamic vinegar (white or dark)
- Salt and pepper to taste
- Optional: A pinch of sugar
- Optional: Toasted pine nuts
Preparation:
Wash the tomatoes and slice them thinly or cut them into bite-sized pieces. If you're using different varieties, arrange them in an alternating pattern to add a pop of color.
Peel the red onion and slice it into thin rings.
Arrange the tomatoes on a large plate or in a shallow dish.
the onion rings over the tomatoes.
Place the Burrata in the center of the plate and gently tear it open to let the creamy filling ooze out a bit.
Season with salt, pepper, and optionally a pinch of sugar.
Drizzle the olive oil and balsamic vinegar evenly over the salad.
Sprinkle fresh basil leaves over the top.
Optionally, add toasted pine nuts for extra crunch and flavor.
Serve the tomato salad immediately, ideally with fresh bread or baguette.
Enjoy!
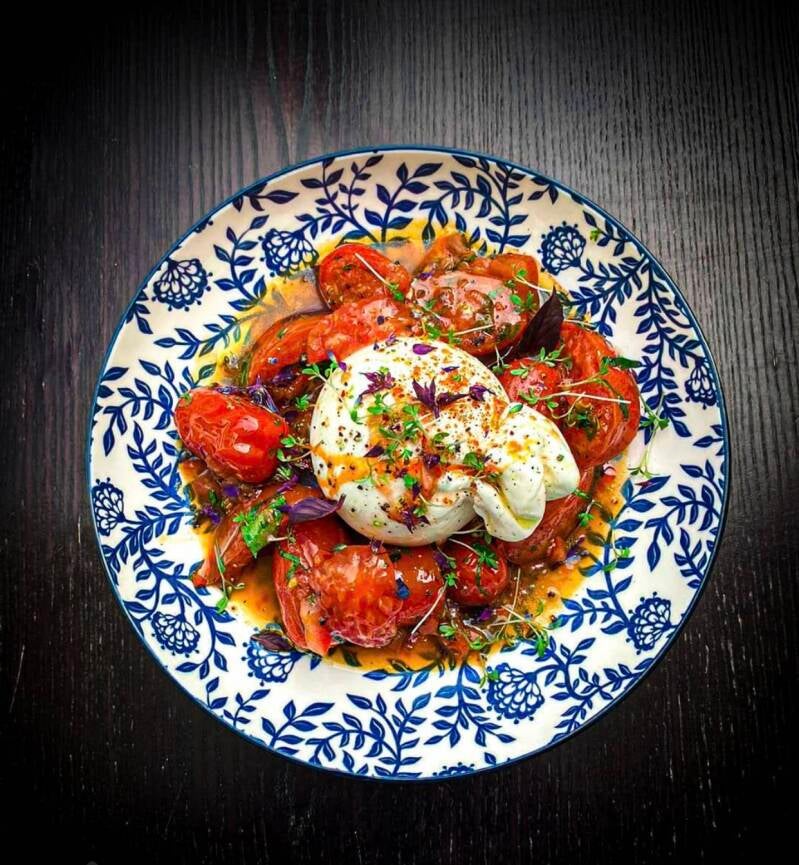
Grandma's Sensational Plum Crumble Cake
Ingredients:
For the Dough:
- 250 g (2 cups) flour
- 125 g (1/2 cup) butter (cold)
- 80 g (1/3 cup) sugar
- 1 egg
- 1 tsp baking powder
- A pinch of salt
For the Filling:
- 1 kg (2.2 lbs) plums (pitted and halved)
- 2 tbsp sugar
- 1 tsp cinnamon
For the Crumble Topping:
- 150 g (1 1/4 cups) flour
- 100 g (1/2 cup) sugar
- 100 g (1/2 cup) butter (cold)
- 1 packet vanilla sugar (or 1 tsp vanilla extract)
Preparation:
The Dough:
In a bowl, mix together the flour, sugar, baking powder, and salt.
Add the cold butter in small pieces and work it into the flour mixture with your fingers until it becomes crumbly.
Add the egg and knead the mixture into a smooth dough.
Wrap the dough in plastic wrap and let it rest in the refrigerator for about 30 minutes.
The Crumble Topping:
In a separate bowl, combine the flour, sugar, and vanilla sugar (or vanilla extract).
Add the cold butter in pieces and mix with your hands or a mixer until crumbly.
The Plums:
Toss the pitted and halved plums in a bowl with the sugar and cinnamon.
Assembling the Cake:
Preheat the oven to 180°C (350°F).
Grease a springform pan (about 10 inches in diameter).
Press the chilled dough into the bottom of the springform pan, creating a small edge up the sides.
Evenly distribute the plums over the dough.
Sprinkle the prepared crumble topping evenly over the plums.
Baking:
Bake the cake in the preheated oven for about 40-50 minutes, until the crumble topping is golden brown.
Remove the cake from the oven and let it cool in the pan.
Enjoy your meal!

German Crispy Roast Pork
Ingredients:
• 4 lb (1.8 kg) pork shoulder with skin (rind on)
• 2 tbsp sea salt
• 1 tsp caraway seeds
• 1 tbsp vegetable oil
• 2 onions, quartered
• 3 carrots, chopped
• 2 celery stalks, chopped
• 4 cloves garlic, smashed
• 2 cups (500 ml) chicken or vegetable broth
• 1 cup (250 ml) beer (optional, for extra flavor)
Instructions:
1. Prepare the pork: Preheat your oven to 320°F (160°C). Score the pork skin in a cross-hatch pattern, about 1 cm deep, being careful not to cut into the meat. Rub the skin generously with sea salt, pressing the salt into the cuts. Rub the rest of the meat with caraway seeds and a little salt. Let the pork sit for about 30 minutes at room temperature.
2. Sear the meat: Heat a large ovenproof pan or roasting tray over medium-high heat and add the vegetable oil. Sear the pork shoulder on all sides, except the skin side, until browned (about 4-5 minutes per side). Remove the pork from the pan and set it aside.
3. Roast the vegetables: In the same pan, add the onions, carrots, celery, and garlic, and cook for a few minutes until they start to soften and brown slightly.
4. Roast the pork: Place the pork, skin-side up, on top of the vegetables. Pour the broth and beer (if using) around the meat. Transfer the pan to the oven and roast for about 2 hours, basting the pork occasionally with the pan juices.
5. Increase heat for crispy skin: After 2 hours, increase the oven temperature to 450°F (230°C). Continue roasting for another 30-40 minutes, or until the skin becomes golden and crispy. If needed, turn on the broiler (grill) for the last 5-10 minutes to crisp the skin even more, but watch carefully to prevent burning.
6. Rest and serve: Once the pork has reached an internal temperature of 160°F (71°C) and the skin is crispy, remove it from the oven and let it rest for about 10 minutes. Slice the pork and serve with the crispy skin.
Suggested Sides:
• Sauerkraut
• Potato dumplings (Kartoffelknödel)
• Red cabbage (Rotkohl)
• Gravy made from the pan juices
Enjoy your traditional Schweinekrustenbraten—a perfect dish for a hearty meal with delicious crispy crackling!
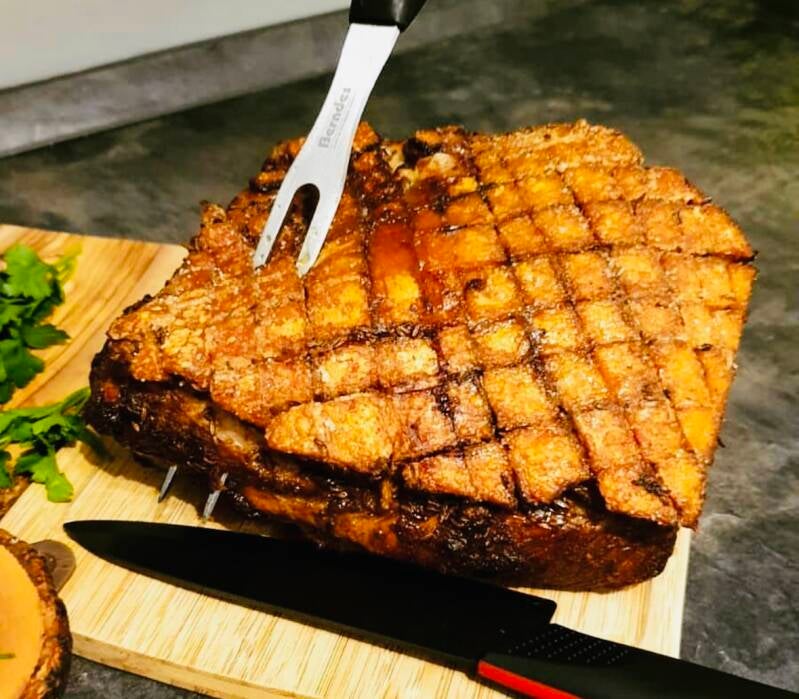
Incredible Berry Smoothie
Ingredients:
- 150 g (1 cup) mixed berries (e.g., strawberries, raspberries, blueberries)
- 1 banana
- 200 ml (3/4 cup) milk (or a plant-based alternative like almond or oat milk)
- 100 g (1/2 cup) yogurt (optional, for a creamier texture)
- 1 tsp honey or agave syrup (optional, depending on desired sweetness)
- A handful of ice cubes (optional, for a refreshing touch)
Preparation:
If you're using fresh berries, wash them thoroughly. Frozen berries can be used directly.
Peel the banana and break it into pieces.
Place the berries, banana, milk, and yogurt into a blender.
If you prefer a sweeter smoothie, add the honey or agave syrup now.
For a chilled smoothie, add the ice cubes.
Blend everything until you reach a creamy, smooth consistency.
Pour the smoothie into a glass and enjoy immediately.
Enjoy your meal!

Stuffed Figs with Cream Cheese and Nuts
Ingredients:
• 8 fresh figs
• 5 oz (150 g) cream cheese (goat cheese or regular cream cheese)
• 1/4 cup (50 g) walnuts or pecans, roughly chopped
• 1 tablespoon honey
• 1 teaspoon lemon zest (grated)
• A pinch of cinnamon (optional)
• Salt and pepper to taste
• Fresh herbs like thyme or mint (for garnish)
Instructions:
1. Prepare the figs:
• Wash the figs and trim off the stem ends.
• Cut a cross into the top of each fig, but don’t cut all the way through. Gently open them up to create space for the filling.
2. Make the cream cheese filling:
• In a bowl, mix the cream cheese with honey, lemon zest, a pinch of cinnamon (optional), salt, and pepper until smooth.
• Stir in the chopped nuts.
3. Stuff the figs:
• Gently fill each fig with a spoonful of the cream cheese mixture.
4. Serve:
• Arrange the stuffed figs on a serving plate and garnish with fresh herbs like thyme or mint.
• For extra sweetness, drizzle more honey over the figs.
Tip: You can also warm the stuffed figs in the oven at 350°F (180°C) for 5–10 minutes for a cozy, soft texture.
Enjoy your Stuffed Figs with Cream Cheese and Nuts as a delicious appetizer or sweet-and-savory snack!

Brioche Bun
Ingredients:
- 3 tbsp milk (3.8% fat), room temperature
- 40 g (1/4 cup) raw sugar
- 380 g (3 cups) flour, Type 550, plus extra for dusting the work surface
- ½ cube (21 g) fresh yeast
- 1 large egg
- 35 g (2.5 tbsp) soft butter
- 3 tsp flour, Type 405
- 9 g (1.5 tsp) sea salt
- 240 ml (1 cup) water
Before Baking:
- 1 egg white
- 1 tbsp water
- 1 pinch salt
Preparation:
1. Warm the milk in a saucepan to 113°F (45°C), then pour it into a bowl. Add 1 tbsp of sugar and 1 tbsp of flour (Type 550) to the milk as a starter, then crumble in the yeast and stir. Let it sit for 10 minutes until bubbles form.
2. Meanwhile, lightly beat the egg with the remaining sugar in a separate bowl.
3. In a large bowl, mix the soft butter with both types of flour and the sea salt until you achieve a crumbly texture, similar to streusel. Gradually incorporate the yeast-milk mixture, water, and the egg. Now, either set your stand mixer to medium speed for 6 minutes or start kneading by hand.
4. If you're doing it by hand, roughly mix the ingredients with a wooden spoon, then transfer the dough to a work surface and keep folding and kneading it until it's completely smooth. This can easily take 15 minutes and is quite a workout, so using a stand mixer is highly recommended.
Really, dude!

House-Cured Salmon Fillet
Ingredients:
- 1 lb (450 g) fresh salmon fillet, skin on, pin bones removed
- ¼ cup (60 g) kosher salt
- ¼ cup (50 g) granulated sugar
- 1 tbsp freshly ground black pepper
- 1 tbsp lemon zest (from about 1 lemon)
- 1 tbsp fresh dill, chopped (optional)
- 1 tbsp vodka or gin (optional, for extra flavor)
Instructions:
Prepare the Curing Mix:
In a small bowl, combine the kosher salt, sugar, black pepper, lemon zest, and fresh dill (if using). Mix well.
Cure the Salmon:
Place a large piece of plastic wrap on a flat surface. Sprinkle half of the curing mix onto the plastic wrap, spreading it to match the size of the salmon fillet.
Lay the salmon fillet, skin-side down, on top of the curing mix. Sprinkle the remaining curing mix over the top of the salmon, making sure the fillet is evenly covered.
Wrap and Press:
If using, sprinkle the vodka or gin over the salmon. Wrap the salmon tightly in the plastic wrap, then place it on a rimmed baking sheet.
Place another baking sheet or a heavy object (like a cast-iron skillet) on top of the wrapped salmon to weigh it down. This helps press out moisture and ensures even curing.
Refrigerate:
Transfer the weighted salmon to the refrigerator. Let it cure for 24-48 hours, depending on how firm and flavorful you want it. Turn the salmon over once halfway through the curing process.
Rinse and Dry:
After curing, unwrap the salmon and rinse off the curing mixture under cold water. Pat the fillet dry with paper towels.
Slice and Serve:
Place the salmon on a cutting board, skin-side down. Using a sharp knife, slice the salmon thinly on a bias (at an angle) for serving.
Serving Suggestions:
Serve the house-cured salmon with bagels, cream cheese, capers, red onions, and fresh dill. It’s also delicious on rye bread with mustard or as part of a salad.
Storage:
The cured salmon can be stored in the refrigerator, tightly wrapped, for up to 1 week.

The Perfect Beef Tartare
Ingredients:
- 300 g (10.5 oz) high-quality beef tenderloin, finely chopped
- 1 small shallot, finely diced
- 1 tbsp capers, finely chopped
- 1 tbsp Dijon mustard
- 1 tsp Worcestershire sauce
- 1 tsp Tabasco sauce (optional, for heat)
- 1 egg yolk (preferably pasteurized)
- 1 tbsp finely chopped fresh parsley
- 1 tbsp olive oil
- Salt and pepper to taste
- Lemon wedges (for serving)
- Toasted bread or crackers (for serving)
Preparation:
Prepare the Beef:
Ensure the beef is very cold before chopping. Finely chop the beef tenderloin with a sharp knife until it reaches a fine, minced consistency. Place the chopped beef in a mixing bowl.
Mix the Ingredients:
Add the finely diced shallot, capers, Dijon mustard, Worcestershire sauce, Tabasco sauce (if using), and chopped parsley to the bowl with the beef. Mix everything together gently but thoroughly.
Add the Egg Yolk:
Add the egg yolk to the beef mixture. Drizzle in the olive oil, then season with salt and pepper to taste. Gently fold the mixture together until all the ingredients are well combined.
Serve:
Shape the beef mixture into a round patty or mound on a plate. Serve immediately with lemon wedges on the side, along with toasted bread or crackers.
Enjoy your Beef Tartare!

Steam-Charred Green Cabbage with Homemade Hummus
Ingredients:
For the Cabbage:
• 1 medium green cabbage, quartered
• 2 tablespoons olive oil
• Salt and pepper to taste
• 1 teaspoon smoked paprika (optional)
• Lemon wedges (for serving)
For the Homemade Hummus:
• 1 can (15 oz) chickpeas, drained and rinsed
• 1/4 cup tahini
• 2 tablespoons olive oil
• 1 garlic clove, minced
• Juice of 1 lemon
• 1/2 teaspoon ground cumin
• Salt and pepper to taste
• 2-4 tablespoons water (to adjust consistency)
Instructions:
1. Prepare the cabbage:
• Preheat your grill or heat a grill pan on medium-high heat.
• Lightly brush the cabbage quarters with olive oil and season with salt, pepper, and a sprinkle of smoked paprika if desired.
• Place the cabbage quarters in a steamer for about 10 minutes until they start to soften but aren’t fully tender.
• Once steamed, transfer the cabbage to the grill or grill pan and cook for about 3-4 minutes per side, until charred and tender.
2. Make the hummus:
• In a food processor, blend the chickpeas, tahini, olive oil, garlic, lemon juice, cumin, salt, and pepper. Slowly add water, a tablespoon at a time, until the hummus reaches your desired creamy consistency.
• Taste and adjust seasoning with more salt, lemon, or garlic as needed.
3. Serve:
• Spread a generous layer of hummus on a serving platter, creating a smooth, soft base.
• Place the steam-charred cabbage quarters on top of the hummus.
• Garnish with a drizzle of olive oil and a squeeze of lemon juice over the cabbage.
• Serve warm with extra lemon wedges on the side.
Enjoy the combination of tender, charred cabbage with the creamy, fragrant homemade hummus!

White Wine Sauce for Fish Dishes
Ingredients:
- 1/2 onion (or 1 shallot), finely chopped
- 1/4 liter (1 cup) fish stock
- 1/8 liter (1/2 cup) dry white wine
- 1/8 liter (1/2 cup) Noilly Prat (vermouth)
- 1/8 liter (1/2 cup) heavy cream
- About 50 g (3.5 tbsp) butter (for finishing)
- 2 tbsp lightly whipped cream
- Salt, pepper, lemon juice
Preparation:
Sauté the Onion:
Sauté the finely chopped onion (or shallot) in butter until softened.
Deglaze and Reduce:
Deglaze with the white wine and vermouth. Pour in the fish stock. Let the mixture reduce by at least half, then strain through a fine sieve.
Add the Cream and Reduce:
Add the cold heavy cream to the strained sauce, then reduce again by half.
Finish with Butter:
Gradually whisk in the cold butter pieces until the sauce is smooth and creamy. Use an immersion blender to emulsify if necessary.
Final Touches:
Stir in the lightly whipped cream and season with salt, pepper, and a squeeze of lemon juice to taste.
Enjoy your cooking!

Lemon Curd Tarte
Ingredients:
For the Crust:
• 1 1/4 cups (160g) all-purpose flour
• 1/4 cup (50g) granulated sugar
• 1/4 tsp salt
• 1/2 cup (115g) unsalted butter, cold and cubed
• 1 egg yolk
• 1-2 tbsp ice water
For the Lemon Curd:
• 4 large eggs
• 1 cup (200g) granulated sugar
• 1/2 cup (120ml) freshly squeezed lemon juice (about 3-4 lemons)
• 1 tbsp lemon zest
• 1/2 cup (115g) unsalted butter, cut into small cubes
Optional Garnish:
• Fresh berries
• Powdered sugar for dusting
• Whipped cream
Instructions:
Make the Crust:
1. Prepare the dough: In a mixing bowl, combine the flour, sugar, and salt. Add the cold butter cubes and rub them into the flour mixture using your fingertips or a pastry cutter until the mixture resembles coarse crumbs. Add the egg yolk and 1 tbsp of ice water. Mix until the dough starts to come together. If needed, add another tablespoon of water.
2. Chill the dough: Form the dough into a disk, wrap it in plastic wrap, and refrigerate for 30 minutes.
3. Preheat the oven: Preheat your oven to 350°F (175°C).
4. Roll out the dough: On a lightly floured surface, roll out the dough into a circle about 1/8 inch (3 mm) thick. Carefully transfer it to a 9-inch tart pan and press it into the edges. Trim any excess dough. Prick the bottom with a fork to prevent puffing.
5. Blind bake the crust: Line the crust with parchment paper and fill it with pie weights or dried beans. Bake for 15 minutes, then remove the weights and parchment paper. Bake for another 10-12 minutes, or until the crust is lightly golden. Set aside to cool.
Make the Lemon Curd:
1. Whisk the eggs and sugar: In a medium saucepan, whisk together the eggs, sugar, lemon juice, and lemon zest until smooth.
2. Cook the lemon curd: Place the saucepan over medium heat and cook, stirring constantly with a whisk or wooden spoon, until the mixture thickens and coats the back of a spoon, about 8-10 minutes. Be careful not to let the mixture boil.
3. Add the butter: Once thickened, remove the saucepan from the heat and stir in the butter, a few cubes at a time, until it melts and the curd is smooth.
4. Strain the curd: For an extra silky texture, strain the lemon curd through a fine-mesh sieve into a bowl to remove any lumps or zest. Cover the surface of the curd with plastic wrap to prevent a skin from forming and let it cool to room temperature.
Assemble the Tarte:
1. Fill the crust: Once the lemon curd has cooled, pour it into the pre-baked tart shell, spreading it evenly.
2. Chill the tarte: Refrigerate the tart for at least 2 hours to allow the lemon curd to set properly.
Serve:
Once the lemon curd tarte is fully chilled, garnish with fresh berries, a dusting of powdered sugar, or a dollop of whipped cream, if desired. Slice and enjoy your Lemon Curd Tarte—a zesty, creamy treat!

Martini Roast Goose
Ingredients:
- 1 goose (about 4 kg / 9 lbs)
- 1/2 bunch fresh marjoram
- 1/2 bunch fresh thyme
- 1 apple, coarsely chopped
- 1 orange, coarsely chopped
- 1 onion, coarsely chopped
- Salt, pepper, garlic
Preparation:
Prep the Goose and Oven:
Quarter the apple, orange, and onion. Preheat the oven to 200°C (390°F). Rinse the cleaned goose under cold water, pat dry with paper towels, and remove any excess internal fat.
Season and Stuff:
Rub the goose inside and out with salt, pepper, and garlic. Stuff the cavity with the chopped apple, orange, onion, and fresh herbs.
Roast the Goose:
Place the goose breast-side down in a roasting pan. Add enough water to cover the bottom of the pan by about an inch. Place the pan in the oven.
Baste Regularly:
As the goose roasts, baste it frequently with the drippings. The water will evaporate, and fat will render out of the goose. After about two hours (halfway through the cooking time), pierce the skin between the breast and leg with a fork to allow excess fat to drain out, and flip the goose over.
Finish Cooking:
Continue roasting, basting regularly, until the skin is crispy and golden brown. As a guideline, roast for about one hour per kilogram (2.2 lbs) of goose. In a convection oven, cooking time may be reduced by half.
Prepare the Sauce:
Once the goose is fully cooked, remove it from the roasting pan and set it aside. Pour off the excess fat from the pan (this can be saved for making goose fat spread). Deglaze the pan with red wine, port wine, and Calvados, then add a little broth and let it reduce slightly.
Serve:
Carve the goose at the table and serve it with red cabbage and chestnut dumplings.
Enjoy your meal!

Stuffed Bell Peppers with Rice
Ingredients:
• 6 large bell peppers (any color)
• 1 cup uncooked long-grain white rice (or brown rice)
• 2 tablespoons olive oil
• 1 onion, finely chopped
• 3 garlic cloves, minced
• 1 lb (450 g) ground beef, turkey, or a vegetarian substitute
• 1 can (14 oz) diced tomatoes (drained)
• 1 teaspoon ground cumin
• 1 teaspoon paprika
• 1 teaspoon dried oregano
• Salt and pepper to taste
• 1/2 cup shredded cheese (cheddar, mozzarella, or your choice)
• Fresh parsley or cilantro for garnish (optional)
Instructions:
1. Prepare the Peppers:
• Preheat your oven to 375°F (190°C).
• Cut the tops off the bell peppers and remove the seeds and membranes inside. If needed, trim the bottoms slightly to help them stand upright.
• Place the hollowed peppers in a baking dish.
2. Cook the Rice:
• Cook the rice according to the package instructions and set aside.
3. Cook the Filling:
• In a large skillet, heat the olive oil over medium heat. Add the chopped onion and cook for 3-4 minutes until softened.
• Stir in the minced garlic and cook for another minute.
• Add the ground meat (or vegetarian substitute) and cook until browned, breaking it apart with a spoon as it cooks. Drain any excess fat if necessary.
• Stir in the diced tomatoes, cooked rice, cumin, paprika, oregano, salt, and pepper. Cook for another 5 minutes to blend the flavors.
4. Stuff the Peppers:
• Spoon the rice and meat mixture into each of the hollowed bell peppers, packing them tightly.
• Top each stuffed pepper with a little shredded cheese.
5. Bake the Peppers:
• Cover the baking dish with foil and bake for 30 minutes.
• Remove the foil and bake for an additional 10-15 minutes, or until the peppers are tender and the cheese is melted and bubbly.
6. Serve:
• Garnish with fresh parsley or cilantro if desired. Serve hot alongside a salad or with extra rice.
Enjoy your Stuffed Bell Peppers with Rice, a delicious and hearty meal!

Creamy cauliflower soup
Ingredients:
- 1 large head of cauliflower, chopped into florets
- 1 medium onion, diced
- 2 cloves garlic, minced
- 4 cups vegetable or chicken broth
- 1 cup heavy cream
- 2 tablespoons olive oil
- 1 teaspoon salt (or to taste)
- 1/2 teaspoon black pepper (or to taste)
- 1/4 teaspoon ground nutmeg (optional)
- 1 cup shredded cheddar cheese (optional, for extra creaminess)
- Fresh parsley, chopped (for garnish, optional)
Instructions:
Prepare the Cauliflower:
In a large pot, heat the olive oil over medium heat. Add the diced onion and cook until softened, about 5 minutes.
Add the minced garlic and cook for an additional 1 minute.
Cook the Cauliflower:
Add the chopped cauliflower to the pot and stir to combine with the onion and garlic.
Pour in the vegetable or chicken broth. Bring the mixture to a boil, then reduce the heat and simmer until the cauliflower is tender, about 15-20 minutes.
Blend the Soup:
Use an immersion blender to puree the soup directly in the pot until smooth. Alternatively, carefully transfer the soup in batches to a blender and blend until smooth. If using a blender, return the soup to the pot after blending.
Add Cream and Seasonings:
Stir in the heavy cream and season with salt, black pepper, and nutmeg (if using). Heat the soup over low heat until warmed through.
If desired, stir in the shredded cheddar cheese until melted and well combined.
Serve:
Ladle the soup into bowls and garnish with chopped fresh parsley if desired.
Enjoy your creamy cauliflower soup!
Feel free to adjust the seasonings or add other ingredients based on your preferences.
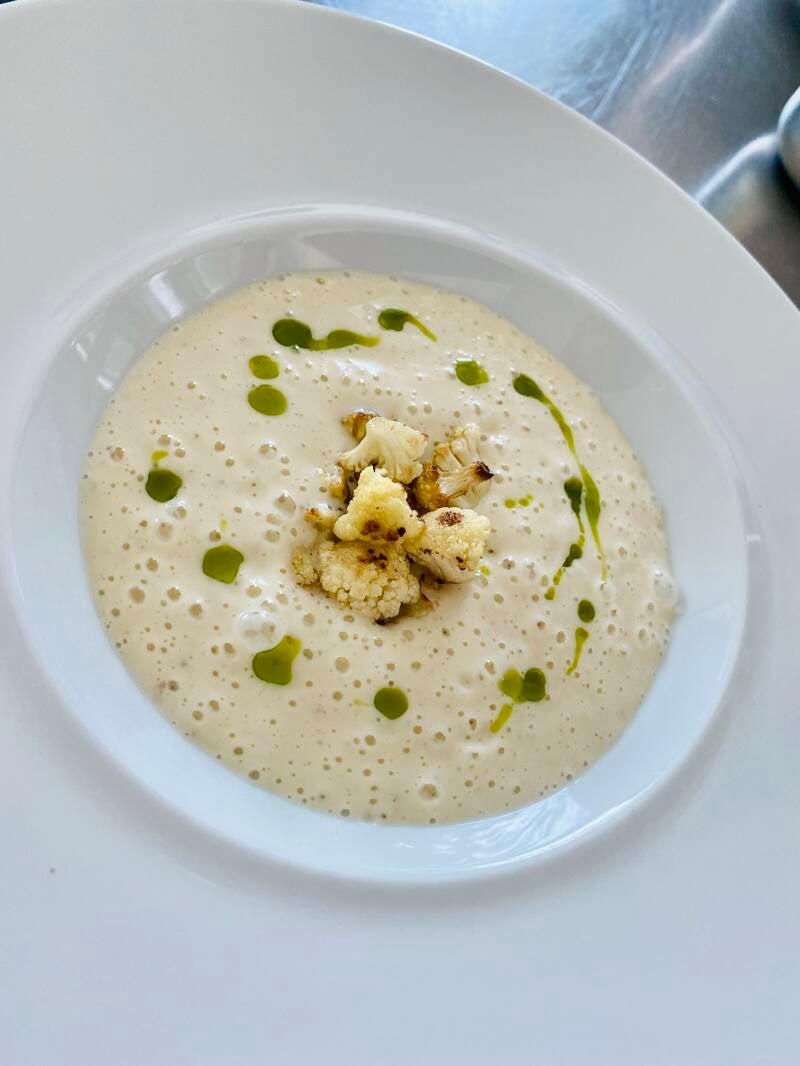
Homemade Pork Bratwurst
Ingredients:
• 3 lb (1.4 kg) pork shoulder (or a mix of pork shoulder and pork belly), coarsely ground
• 1/2 lb (225 g) pork fat, finely ground
• 1/2 cup cold water or beer
• 2 tsp kosher salt
• 1 tsp black pepper, freshly ground
• 1 tsp ground nutmeg
• 1 tsp ground allspice
• 1 tsp garlic powder
• 1 tsp onion powder
• 1/2 tsp ground ginger
• 1/2 tsp marjoram (optional)
• Hog casings (for stuffing)
Instructions:
1. Prepare the casings: Soak the hog casings in warm water for about 30 minutes. Rinse them thoroughly by running water through the inside to remove any excess salt and ensure they’re pliable.
2. Grind the meat and fat: If you’re starting with whole cuts of pork, cut the meat and fat into chunks. Using a meat grinder with a medium or coarse plate, grind the pork shoulder and pork fat together. If using pre-ground pork, make sure it has a good amount of fat to keep the sausage juicy.
3. Season the meat: In a large mixing bowl, add the ground pork, fat, salt, pepper, nutmeg, allspice, garlic powder, onion powder, ginger, and marjoram (if using). Pour in the cold water (or beer) and mix thoroughly with your hands. Knead the mixture until the seasonings are evenly distributed and the mixture becomes sticky, about 5 minutes.
4. Chill the sausage mixture: Cover the sausage mixture and refrigerate for at least 30 minutes, or up to a few hours, to let the flavors meld and to keep the fat cold.
5. Stuff the sausages: Set up a sausage stuffer or a meat grinder with a sausage stuffing attachment. Carefully load the soaked hog casings onto the stuffing nozzle, leaving a little overhang at the end. Tie a knot at the end of the casing, then start stuffing the sausage mixture into the casings, being careful not to overstuff them. Twist the sausage into links at the desired length (usually 6-8 inches long).
6. Chill and dry: Once all the sausages are stuffed, place them on a tray in the refrigerator and allow them to chill for an hour or two. This helps the sausages firm up and dry slightly.
7. Cook the bratwurst:
• Grilling: Preheat a grill over medium heat. Grill the sausages slowly, turning occasionally, until they’re fully cooked and browned, about 15-20 minutes.
• Pan-frying: Heat a little oil in a skillet over medium heat. Fry the sausages, turning them frequently, until browned and cooked through.
• Simmering: To ensure even cooking, you can simmer the sausages in water or beer for 10-15 minutes before grilling or frying.
8. Serve: Enjoy your homemade pork bratwurst with traditional sides like sauerkraut, mustard, potato salad, or fresh bread rolls.
Enjoy your Hausgemachte Bratwurst vom Schwein—a delicious and flavorful homemade German classic!

SACHERTORTE - VIENNA STYLE
For 12 Servings:
- 6 eggs
- 130 g (4.6 oz) butter
- 110 g (3.9 oz) powdered sugar
- 130 g (4.6 oz) bittersweet chocolate
- 1 packet vanilla sugar (or 1 tsp vanilla extract)
- 110 g (3.9 oz) granulated sugar
- 130 g (4.6 oz) flour
- Butter and flour for the pan
- 8 tablespoons apricot jam
- 2 cups chocolate glaze
Instructions:
Prep the Ingredients:
Separate the eggs, and let the butter come to room temperature. Preheat the oven to 180°C (350°F).
Mix the Batter:
In a mixing bowl, cream the butter with the powdered sugar until fluffy. Add the egg yolks one at a time, along with the vanilla sugar. Melt the chocolate in a water bath, ensuring it doesn’t get too hot. Once melted, mix it into the butter mixture.
Beat the Egg Whites:
In a separate bowl, beat the egg whites until they form soft peaks. Gradually add the granulated sugar and continue beating until stiff peaks form. Gently fold the egg whites into the chocolate mixture. Finally, carefully fold in the flour.
Bake:
Grease and flour a springform pan. Pour in the batter, smoothing the top. Bake in the preheated oven for about 1 hour, or until a toothpick inserted in the center comes out clean. Allow the cake to cool completely.
Assemble the Cake:
Once cooled, cut the cake in half horizontally. Lightly warm the apricot jam and strain it if needed. Spread a thin layer of the jam on the bottom layer of the cake. Place the top layer back on and spread a thin layer of jam over the entire outside of the cake.
Glaze the Cake:
Prepare the chocolate glaze and pour it over the cake, covering it completely. Let the glaze set before serving.
Enjoy your Viennese-style Sachertorte!

KAISERSCHMARREN
Ingredients:
- 4 eggs
- 250 ml (1 cup) milk
- 150 g (5.3 oz) all-purpose flour
- 1 tbsp granulated sugar
- 1 packet vanilla sugar (or 1 tsp vanilla extract)
- A pinch of salt
- 50 g (1.8 oz) unsalted butter
- Powdered sugar, for dusting
- Optional: raisins soaked in rum
- Optional: applesauce or plum compote, for serving
Instructions:
Prep the Batter:
Separate the eggs, placing the yolks in one bowl and the whites in another. Whisk the egg yolks with milk, flour, granulated sugar, vanilla sugar, and salt until smooth.
Beat the Egg Whites:
Beat the egg whites until they form stiff peaks. Gently fold the egg whites into the batter until well combined.
Cook the Kaiserschmarren:
Heat the butter in a large, non-stick skillet over medium heat. Pour in the batter and let it cook undisturbed until the bottom is golden brown. If using raisins, sprinkle them over the batter at this stage. Use a spatula to cut the pancake into quarters and flip each piece.
Finish Cooking:
Continue cooking the pieces until they are golden brown on both sides. Use the spatula to tear the pancake into bite-sized pieces.
Serve:
Dust with powdered sugar and serve immediately. Kaiserschmarren is traditionally served with applesauce or plum compote on the side.
Enjoy your Kaiserschmarren!

Marchfeld Asparagus with Vulcano Ham in Spelt Wine Batter
Ingredients:
- 500 g (1 lb) Vulcano ham
- 1 kg (2.2 lbs) asparagus (preferably Marchfeld asparagus)
- 500 ml (2 cups) milk
- 3 large eggs
- 200 g (7 oz) spelt flour
- 80 g (2.8 oz) all-purpose flour
- Salt, nutmeg, white wine
- Oil for frying
Instructions:
Prepare the Asparagus:
Wrap the cooked asparagus in Vulcano ham and secure with toothpicks.
Make the Batter:
In a bowl, mix the milk, egg yolks, and sifted spelt and all-purpose flour to make a batter. Season with salt, nutmeg, and a splash of white wine. Beat the egg whites separately until stiff and fold them into the batter.
Cook the Asparagus:
Dip the wrapped asparagus into the batter and fry in hot oil until golden brown. Remove the toothpicks before serving.
Serving Suggestions:
Serve the asparagus with dipping sauces. For a lighter, summery option, place the asparagus on a bed of colorful, fresh leaf salad and drizzle with balsamic apple vinaigrette.
Enjoy your meal!

Asian Pumpkin Cream Soup
Ingredients:
- 350 g (12 oz) pumpkin flesh, diced
- 80 g (3 oz) leek, chopped
- 80 g (3 oz) carrots, chopped
- 80 g (3 oz) yellow turnips, chopped
- 50 g (1.8 oz) celery, chopped
- 1 garlic clove
- 1 red chili pepper
- 40 g (1.4 oz) lemongrass
- 30 g (1 oz) butter
- 750 ml (3 cups) chicken broth
- 70 ml (2.4 oz) heavy cream
- 70 ml (2.4 oz) coconut milk
- 1 teaspoon green curry paste
- Salt and pepper to taste
Instructions:
Sauté Vegetables:
In a large pot, melt the butter and sauté the diced pumpkin, leek, carrots, yellow turnips, and celery until softened.
Add Liquids and Simmer:
Add the chicken broth, heavy cream, and coconut milk to the pot. Stir in the green curry paste and cook until the vegetables are tender.
Blend the Soup:
Use an immersion blender to puree the soup until smooth. Alternatively, carefully transfer the soup in batches to a blender and blend until smooth.
Season and Serve:
Season with salt and pepper to taste. Adjust the seasoning if needed.
Enjoy your Asian pumpkin soup!

The Best Gnocchi Recipe Ever
For about 4 servings:
- 1000 g (2.2 lbs) starchy potatoes
- 1 egg
- 300 g (2.4 cups) flour
- Salt
Instructions:
Cook the Potatoes:
Boil the potatoes in a large pot of salted water until tender, or steam them at 200°C (392°F) for about 40 minutes. Let them cool, peel, cut into quarters, and press through a potato ricer or food mill.
Make the Dough:
Add the flour, egg, and a pinch of salt to the potato mixture. Quickly knead the ingredients together until a smooth dough forms. Knead just until the dough is homogeneous.
Shape the Gnocchi:
Divide the dough into several pieces and roll each into about 1.5 cm (0.6 inch) thick logs on a well-floured surface. Cut the logs into 1.5 cm (0.6 inch) pieces. Roll each piece over a floured gnocchi board or the back of a fork to create the characteristic ridges.
Cook the Gnocchi:
Boil the shaped gnocchi in a pot of simmering salted water. Once they float to the surface, remove them with a slotted spoon and serve immediately.
Enjoy this recipe!
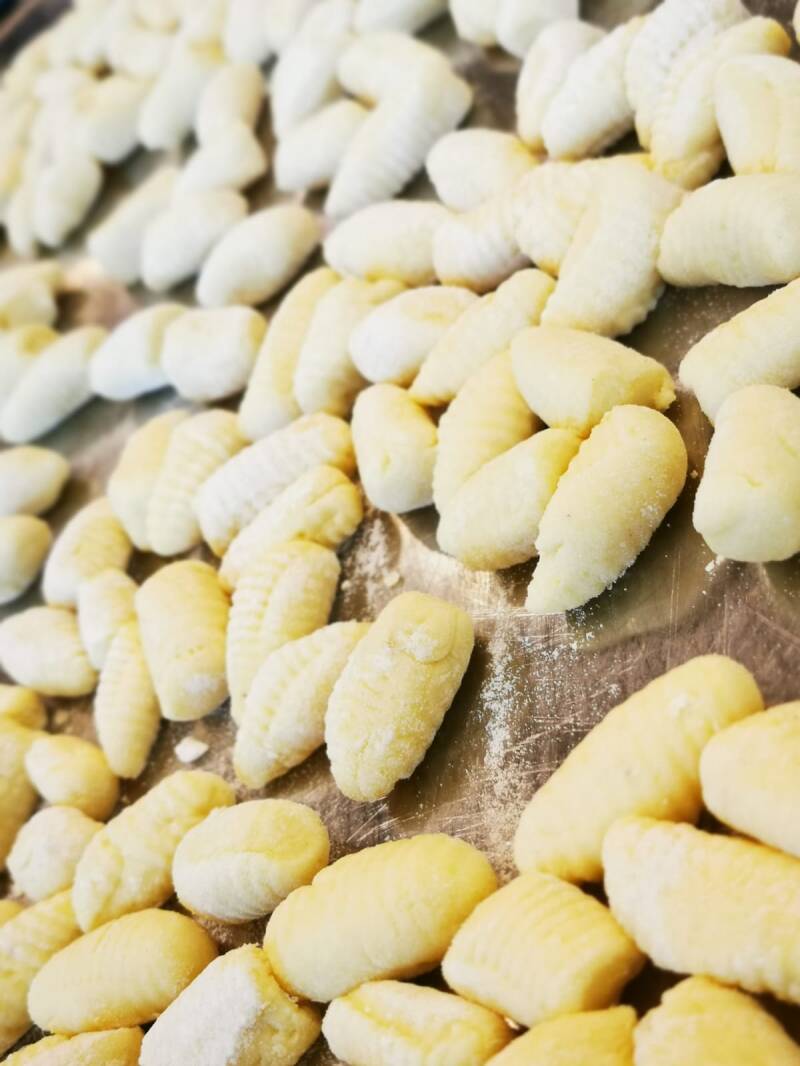
Braised Beef Cheeks
Ingredients:
• 4 beef cheeks (about 2-3 lb or 1-1.5 kg)
• Salt and pepper, to taste
• 2 tbsp vegetable oil
• 2 onions, roughly chopped
• 2 carrots, peeled and chopped
• 2 celery stalks, chopped
• 4 cloves garlic, minced
• 2 tbsp tomato paste
• 1 cup (250 ml) red wine
• 2 cups (500 ml) beef broth
• 2 sprigs fresh thyme
• 2 bay leaves
• 1 tsp ground paprika (optional)
• 1 tbsp balsamic vinegar (optional, for extra depth of flavor)
Instructions:
1. Prepare the beef cheeks: Pat the beef cheeks dry with paper towels and season them generously with salt and pepper on both sides.
2. Sear the beef cheeks: Heat the vegetable oil in a large, heavy pot or Dutch oven over medium-high heat. Add the beef cheeks and sear them for 3-4 minutes on each side until they develop a deep brown crust. You may need to do this in batches to avoid overcrowding the pot. Remove the beef cheeks and set them aside.
3. Sauté the vegetables: In the same pot, add the chopped onions, carrots, celery, and garlic. Cook for 5-6 minutes, stirring occasionally, until the vegetables are softened and starting to brown.
4. Add tomato paste and wine: Stir in the tomato paste and cook for 2-3 minutes to caramelize it slightly. Pour in the red wine, scraping up any browned bits from the bottom of the pot. Let the wine simmer for 5-7 minutes until it reduces by about half.
5. Add broth and herbs: Return the seared beef cheeks to the pot. Add the beef broth, thyme, bay leaves, and paprika (if using). The liquid should just about cover the beef cheeks. If not, add a little more broth or water. Bring the mixture to a simmer.
6. Slow cook the beef cheeks: Cover the pot with a lid and transfer it to an oven preheated to 300°F (150°C). Braise the beef cheeks for 3-4 hours, or until they are fork-tender. Check occasionally to ensure there’s enough liquid—add more broth if needed.
7. Finish the sauce: Once the beef cheeks are tender, remove them from the pot and set them aside. If desired, stir in the balsamic vinegar for extra depth of flavor. Optionally, strain the braising liquid and vegetables to create a smooth sauce, or leave the vegetables in for a rustic presentation.
8. Serve: Serve the braised beef cheeks with mashed potatoes, polenta, or root vegetables, and spoon the rich sauce over the top.
Enjoy your tender and flavorful Geschmorte Rinderbäckchen—a classic dish perfect for special occasions or comforting meals!
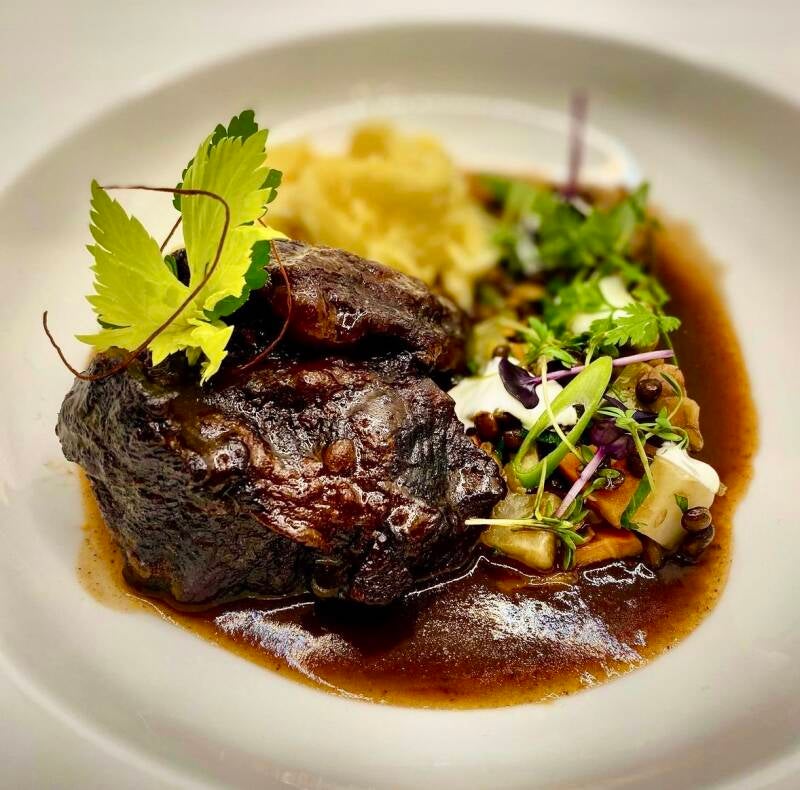
Salmon Tartare
Ingredients:
- 8 oz fresh salmon (sushi-grade), finely diced
- 1 small shallot, finely chopped
- 1 tbsp capers, chopped
- 1 tsp Dijon mustard
- 1 tbsp fresh lemon juice
- 1 tbsp olive oil
- 1 tbsp fresh dill, finely chopped
- 1 tbsp fresh chives, finely chopped
- Salt and pepper to taste
- Optional: diced avocado, for garnish
- Optional: toasted bread or crackers, for serving
Instructions:
Ensure the salmon is fresh and sushi-grade, as this dish is served raw. Dice the salmon into small cubes and place in a bowl.
Mix Ingredients:
Add the chopped shallot, capers, Dijon mustard, lemon juice, and olive oil to the salmon. Mix well.
Add Herbs:
Fold in the dill and chives. Season with salt and pepper to taste.
Chill:
Allow the tartare to chill in the refrigerator for about 10 minutes to let the flavors meld.
Serve:
Plate the salmon tartare and optionally top with diced avocado. Serve with toasted bread or crackers.
Enjoy your meal!
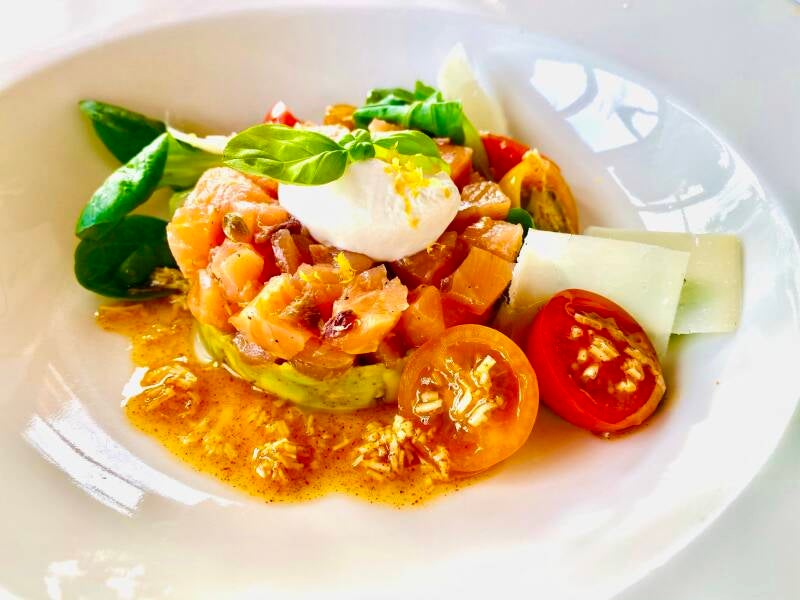
Power Granola for Your Cereal
Ingredients:
- 170 g (6 oz) rolled oats
- 45 g (1.6 oz) shredded coconut
- 45 g (1.6 oz) chopped nuts (any type of nut can be used)
- 150 g (5.3 oz) honey (or agave syrup for a vegan option)
- 55 g (2 oz) butter, cubed (or vegan margarine)
- 1 teaspoon vanilla sugar
- 1 teaspoon cinnamon
- 130 g (4.6 oz) dried cranberries
Instructions:
Preheat Oven:
Preheat the oven to 175°C (350°F).
Mix Ingredients:
Combine all ingredients except the cranberries in a large bowl and mix well.
Bake:
Spread the mixture onto a baking sheet with low edges. Bake in the preheated oven for 15-18 minutes, or until the granola is golden brown. Stir halfway through baking for even toasting.
Cool and Add Cranberries:
Remove from the oven and stir in the cranberries. Let the granola cool completely. Store in an airtight container.
Enjoy your crunchy granola!

Indian Butter Chicken (Murgh Makhani)
Ingredients:
For the Chicken Marinade:
• 500 g (1 lb) boneless chicken thighs or breasts, cut into bite-sized pieces
• 1 cup plain yogurt
• 1 tablespoon lemon juice
• 2 teaspoons garam masala
• 1 teaspoon ground cumin
• 1 teaspoon ground coriander
• 1 teaspoon turmeric powder
• 1 teaspoon red chili powder (adjust to taste)
• Salt to taste
• 2 tablespoons vegetable oil
For the Butter Chicken Sauce:
• 3 tablespoons butter
• 1 large onion, finely chopped
• 3 garlic cloves, minced
• 1 tablespoon fresh ginger, minced
• 1 teaspoon ground cumin
• 1 teaspoon garam masala
• 1 teaspoon ground coriander
• 1 teaspoon paprika
• 1 teaspoon turmeric powder
• 1 can (400 g/14 oz) crushed tomatoes
• 1/2 cup heavy cream
• 1/2 cup water (or chicken stock)
• Salt to taste
• 1 tablespoon sugar (optional, to balance acidity)
• Fresh cilantro (coriander) leaves for garnish
Instructions:
1. Marinate the Chicken:
• In a large bowl, mix the yogurt, lemon juice, garam masala, cumin, coriander, turmeric, chili powder, salt, and vegetable oil.
• Add the chicken pieces, ensuring they’re well-coated. Cover and marinate in the refrigerator for at least 1 hour, or ideally overnight for deeper flavor.
2. Cook the Chicken:
• Preheat a grill or heat a large skillet over medium heat.
• Remove the chicken from the marinade and cook in batches until browned and cooked through (about 5-7 minutes per side). Alternatively, you can bake the chicken at 400°F (200°C) for 20-25 minutes. Set the cooked chicken aside.
3. Make the Butter Chicken Sauce:
• In a large pan, melt the butter over medium heat.
• Add the chopped onions and sauté until golden and soft, about 5 minutes.
• Stir in the garlic and ginger, cooking for another minute until fragrant.
• Add the cumin, garam masala, coriander, paprika, and turmeric, and cook for another 1-2 minutes to toast the spices.
• Stir in the crushed tomatoes and cook for 10-15 minutes until the sauce thickens slightly.
• Add the heavy cream and water (or chicken stock), stirring to combine. Simmer for another 5 minutes, adjusting the salt and adding a bit of sugar if the sauce is too tangy.
4. Combine and Serve:
• Add the cooked chicken pieces to the sauce and simmer for another 5-10 minutes to allow the flavors to meld.
• Garnish with fresh cilantro leaves and an extra drizzle of cream if desired.
Serve:
• Serve your Butter Chicken hot with basmati rice, naan, or roti.
Enjoy this rich, flavorful Indian classic!
